Backyard Home (ADU) Blog
This blog provides the information needed to plan your backyard home project and build an ADU on your property. We cover everything from financing to eligibility to construction.

Planning Your Backyard Project (Video)
This video walks through the planning process that we used for our project in Easthampton step by step.
Learn how we planned our backyard home (ADU) project in Easthampton, Ma
This video walks through the planning process that we used for our project in Easthampton step by step. The video is specific to the Easthampton home, but the information will help point you in the right direction for your project.
The video explains how we:
Replaced the water service line (and why)
Connected water and sewer
Evaluated the existing electric service
Added a new electric and cable service
Found the property lines
Measured setbacks
Decided where to place the home
Parking requirements
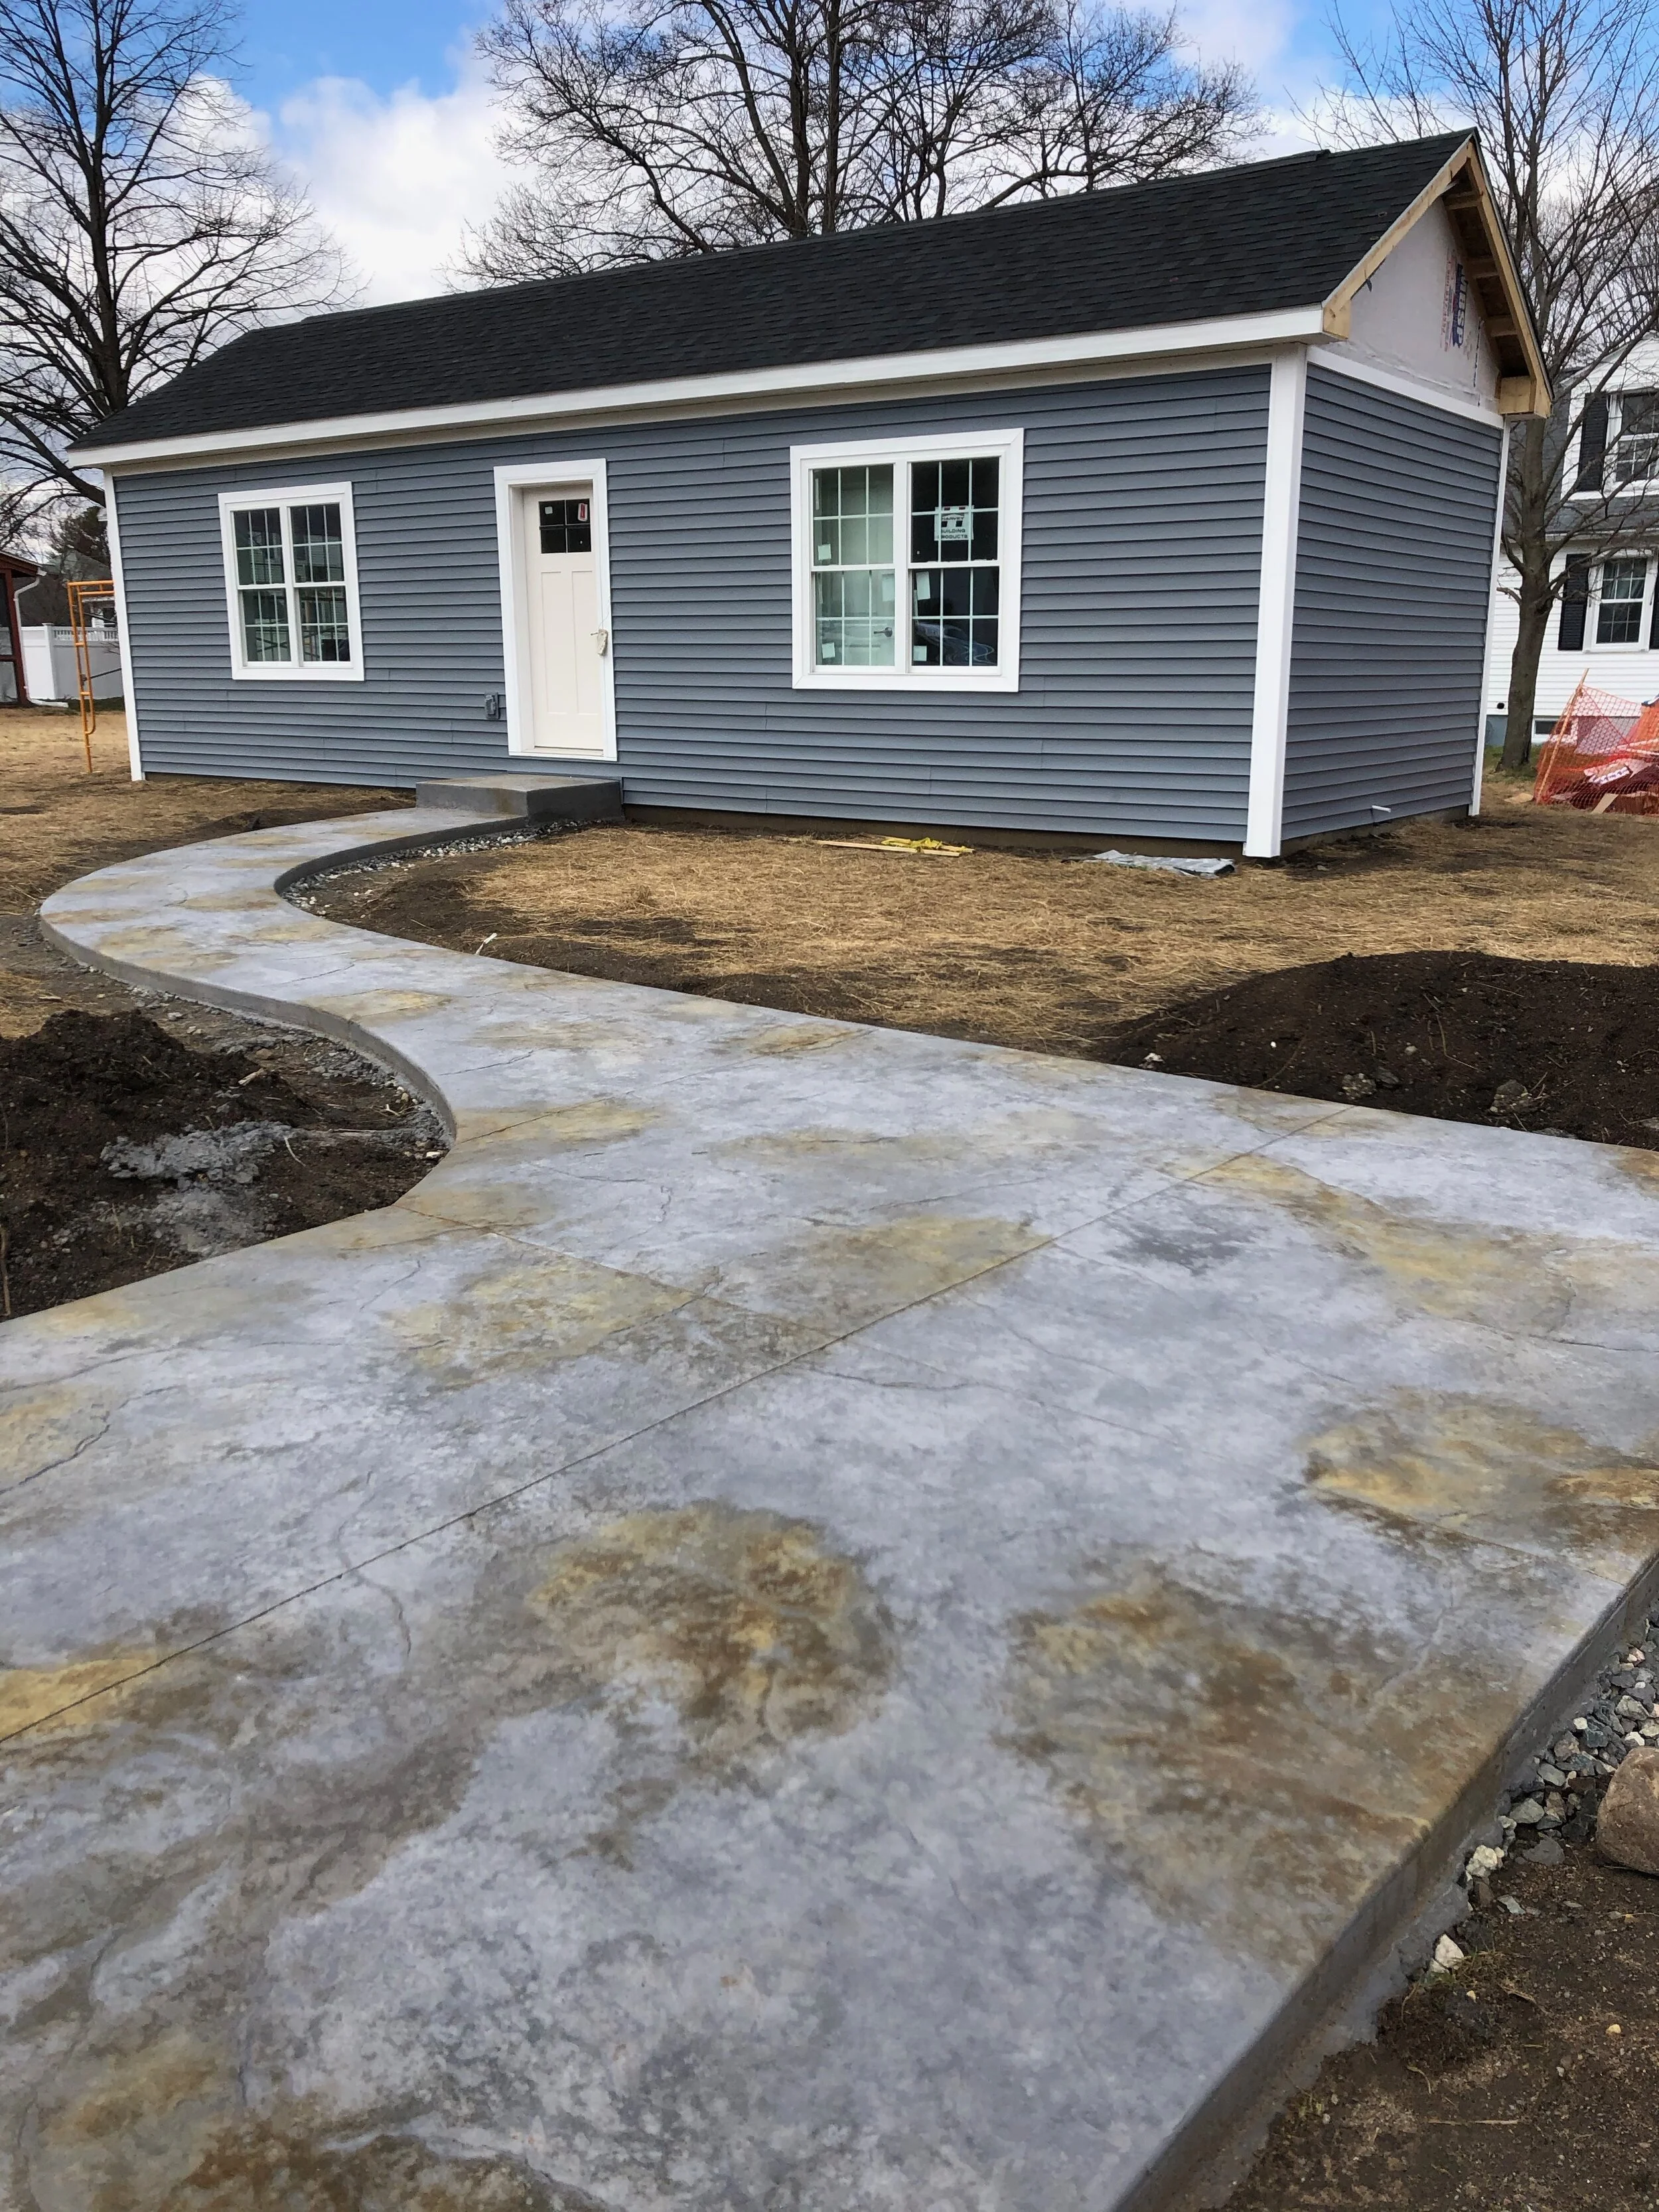
Mayher Street – Day 20ish
Once the house is set onto its foundation only two additional weeks are required for the house to be move-in ready. We had already lined up numerous contractors and now we needed to organize all…
Once the house is set onto its foundation only two additional weeks are required for the house to be move-in ready. We had already lined up numerous contractors and now we needed to organize all of them to get the house fully completed. At this point, it is a real test of project management skill to coordinate about 7 different small businesses whose tasks are inter-related and to some extent dependent on each other.
For example, you can’t turn the water on until the heat is working, and heat doesn’t work until the electricity is connected and you can’t get electricity flowing until the power company runs a new service from the street!
As this was the first project we purposely didn’t schedule our team too tight. There is nothing worse for a subcontractor than scheduling them too early and needing to cancel on short notice because a prior task required more time. It drives havoc into their schedule and will cost someone money (them, us or the homeowner).
At the end of Day 20, we were just about done, but the Covid-19 forced us to slam on the brakes. More on that in our next post.
So what did we do?

Mike and Mike talking about siding

Siding is done and the gable end is waiting for Lou Conover to do his design work.
Finish the Siding
The house components do not come fully sided. This is mostly due to our insistence on upgraded insulation techniques, a steeper pitched roof, and 10” roof overhangs. This means our onsite team is responsible for installing the soffits, facia, frieze board details, and some of the actual siding. In total, this is about 2.5 days of work for two carpenters.
Despite the additional cost (about $7,500-10,000), we feel strongly that these add-ons are worth the expense.
However, there are exceptions. If you like single pitch roof designs we can have those delivered with all of the sidings already on. This keeps more tasks in the highly efficient factory saving time and money.


Install the Heat Pump for Heating and Cooling
Pomeroy Climates spearheaded our super-efficient HVAC system. In this home, we installed a 2-head heat pump system (aka mini-split). This system is capable and heating and cooling year-round and forecast to cost 20% less than natural gas to run.
We also include 2 heads despite only needing 1 to heat and cool the 525 SF. This cost an extra $1,300, but it means the bedroom and living area can be kept at different temperatures. This means you can keep the bedroom cooler for sleeping and over the course of the year will use less energy.


Hook Up Plumbing
Andy Black of Prestige Plumbing hooked up the plumbing. For these homes, this means connecting all fixtures together and then connecting everything to the main service lines.
For most backyard homes (ADUs), the plumbing will then be connected to the water and sewer service already used by the main house. We extended the service lines from the main house via a 4’ deep trench earlier in the construction process.


Connect Electrical
The task list for our electrician, Ryan Martin of Current Electric, was a bit more extensive than the plumbing. Ryan had to:
Run wire through an underground conduit to get a 100 amp electric service to the house
Install the meter socket
Coordinate with Eversource
Install two exterior light fixtures and several interior fixtures
Install lights in the basement and attic
Connect the electrical panel to the meter socket
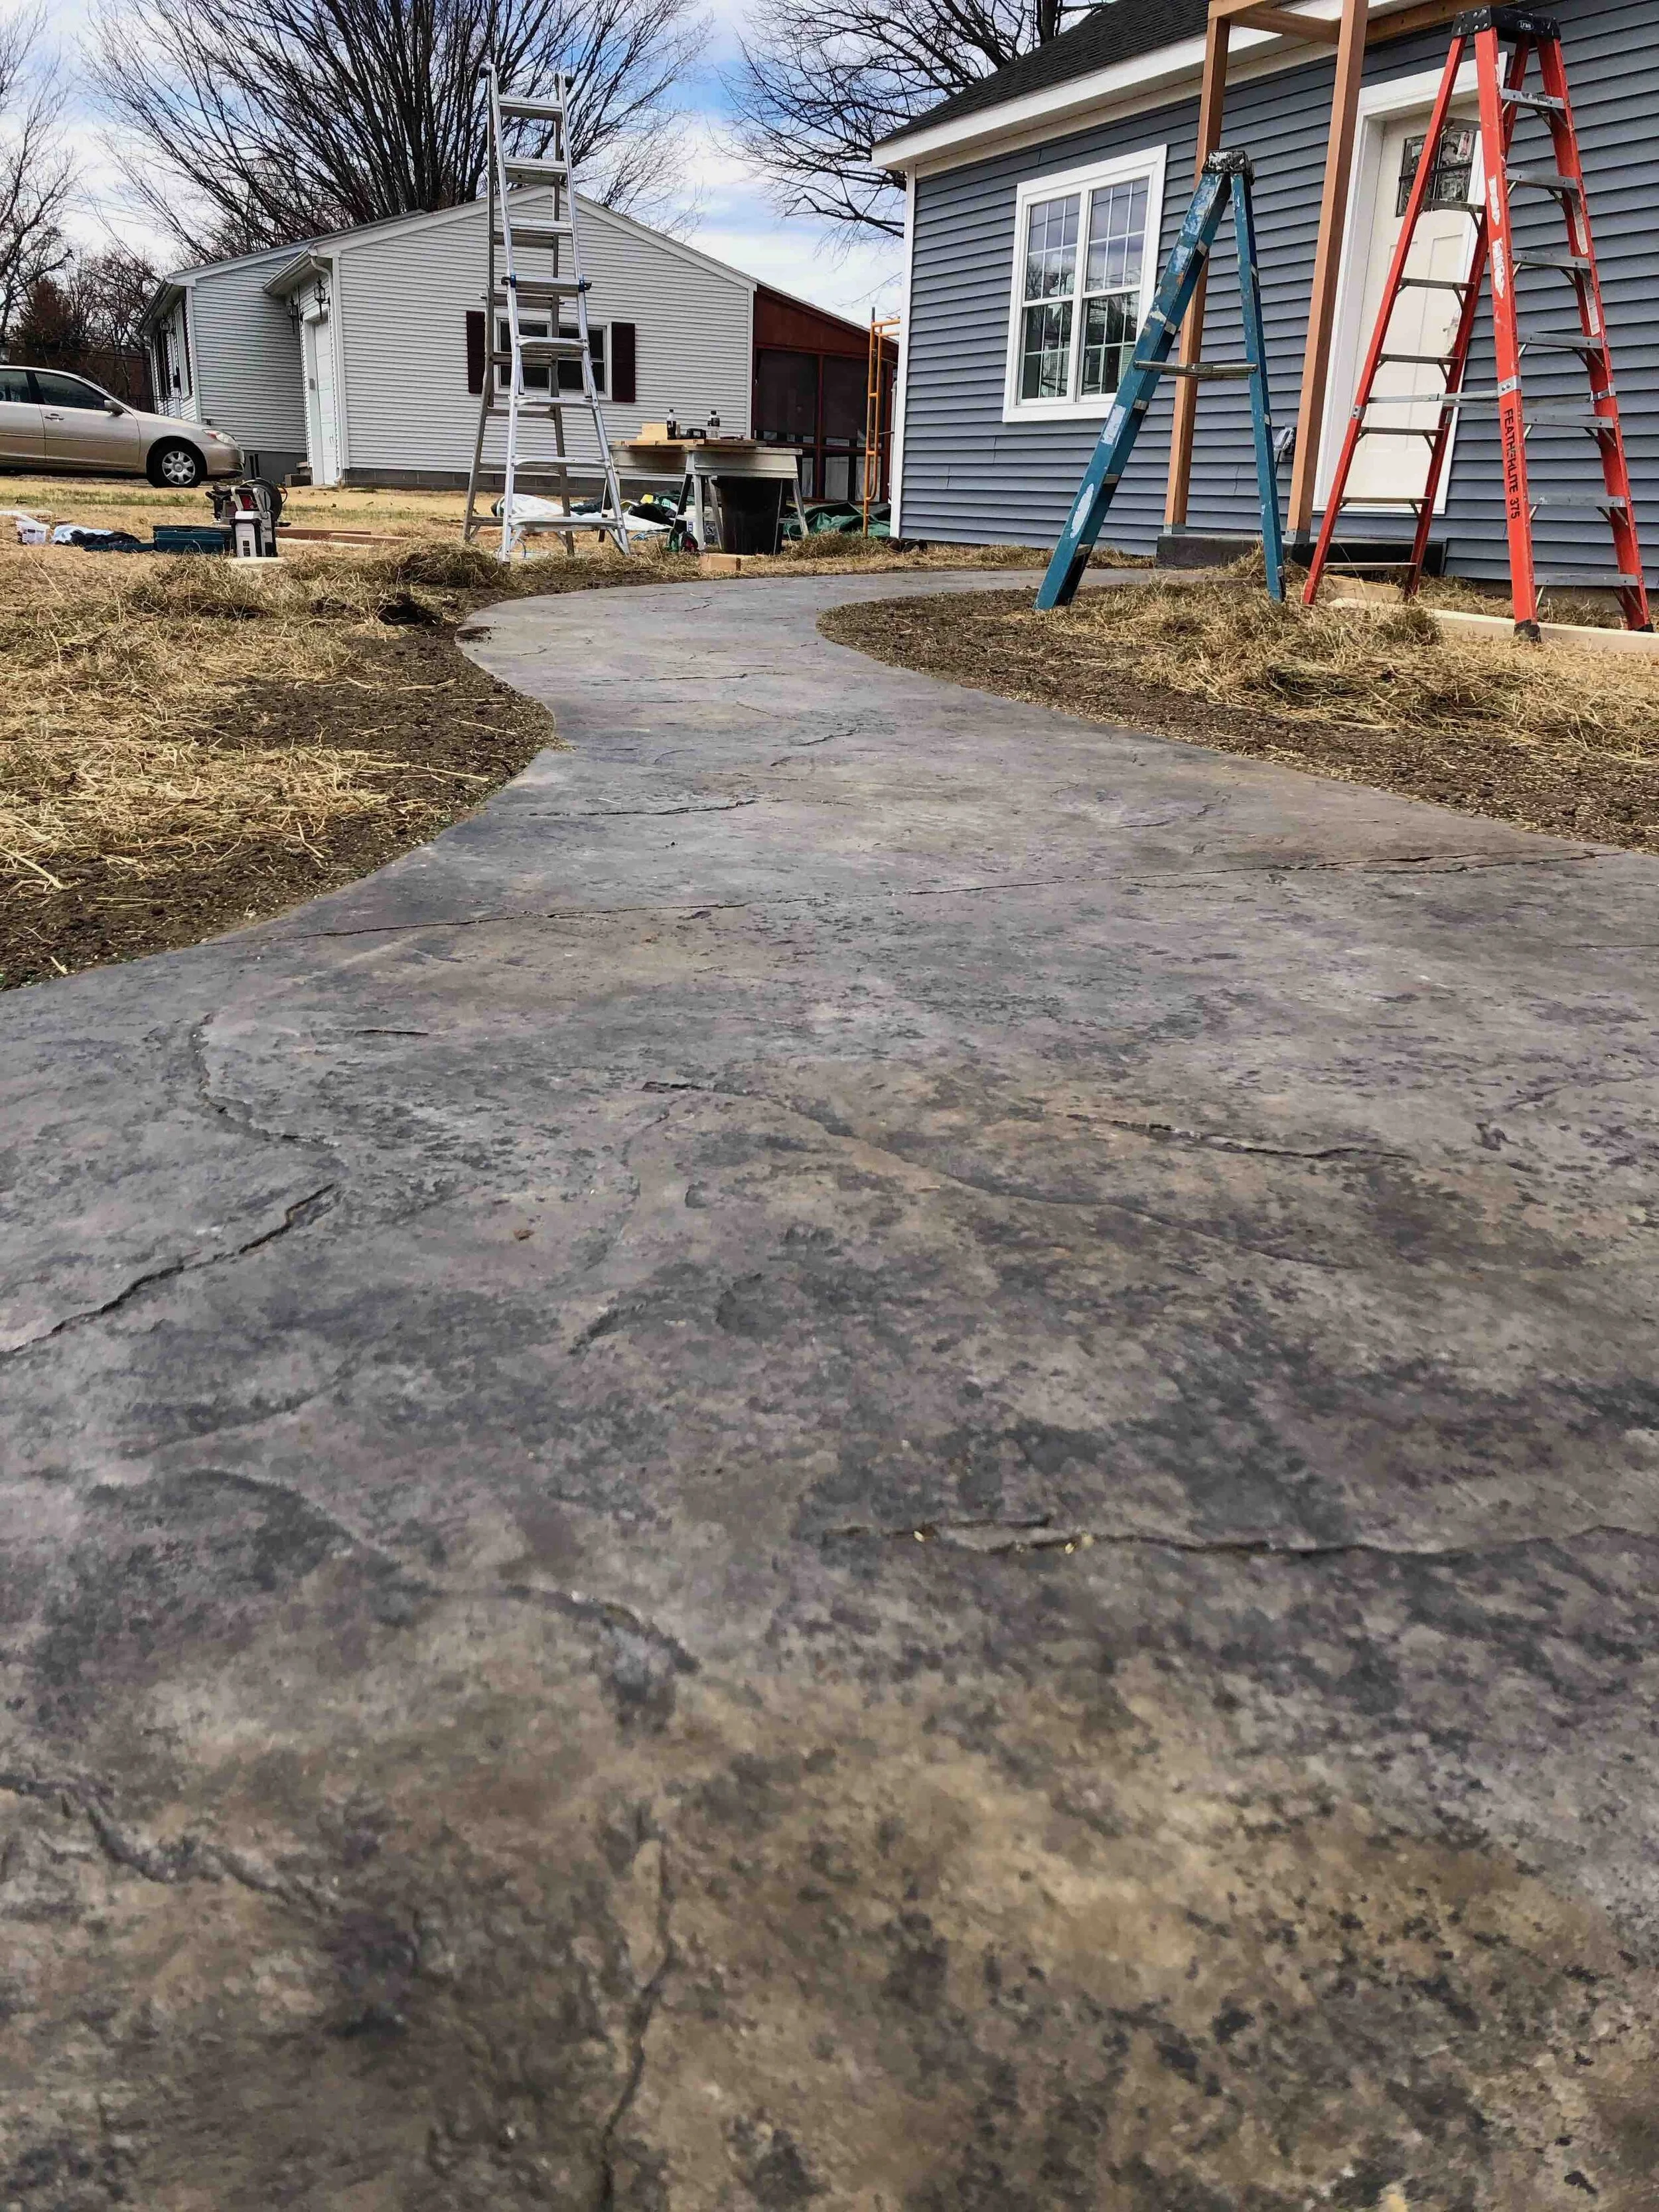
“Fractured Earth” by Crystal Brook Decorative Concrete.


Just another wheel barrow chair
Install Parking Pad and Front Walkway
Crystal Brook took point on the parking pad and beautifully curved front walkway. Justin’s team did all the concrete work for this project including the foundation and everything was spot on. For the concrete coloring, he used a special process of dying the concrete in the truck, drawing the color to the surface and then adding accents with acid. This helps prevent the color from fading.
The stamped concrete design that Ramona chose is called “fractured earth”. Overall we were amazed by what Justin is able to do with concrete.
ADD AN ENDING??
Enormous progress as been achieved, and had it not been for the pandemic, we would have met our two-week completion goal.
-or-
We would have easily achieved our two-week completion goal if we had not been rudely interrupted by the pandemic. The only tasks remaining now are XY and Z. With any luck we will all be back to work soon!
Get notified of updates to the Mayher St project:

Mayher Street– Day 6
At the end of Day Seven, the house is ready for its journey to Easthampton. Wow, that was fast and an assessment to the power of assembly line processes.
At the end of Day 6, PBS had finished our off-site construction, and the home was just awaiting the countertops before they shipped it to Easthampton. We traveled down to Middleburg last week to inspect the almost–finished product, and we’re impressed with both the craftsmanship and the team that pulled it together.
We met Lori Gaugler, who is in addition to taking all of these photos, is tasked with staying up to date on the finishing options for homes from countertops to corner boards. Her office was full of sample house pieces and cutting edge knowledge about the best finishings to use to optimize quality and budget.
We met Nicholas Lust, who is the director of engineering. He showed us plans for a 6,500 SF mansion on long island that PBS is helping build (wow…). He also enlightened us on the enormous amount of thought that goes into stacking and scheduling their factory floor to keep costs down for future homeowners. His attention to detail even goes as deep as the thickness of the tires on the trucks used to transport home components.
We met Raph, who is in charge of quality assurance for the finished homes. He took us on a tour of our home and pointed out all the work they had done. It was clear he knows how to manage a team and ship quality.
We met Kevin who heads up transportation. He oversees a fleet of trucks and skilled drivers to make sure the houses get to their resting places safely. His work includes getting permits, checking for low bridges, powerlines, hazards, and keeping the truck in safe working order.
We also met up with Janice Willits, who is PBS’s lead sales engineer and has been crucial to the formation of Backyard ADUs. Her depth of knowledge in off-site construction, design trends, and willingness to help a newcomer learn the industry has been instrumental.


Kitchen Awaiting its Backsplash
The kitchen is looking great! The homeowner went with an elegant combination of black quartz, white cabinets, and a custom backsplash that we will finish onsite and is going to be a show stopper.
We will also be installing three pendant lights above the island when the house reaches Easthampton.

LIving room and the back door
Here is a view of the living room and rear door, which is required by code as the second form of egress on dwellings with more than 400SF of living area. However, we think that the door will get plenty of use behind emergency egress as the homeowner venture into the backyard to her family’s house 40’ feet away!
The space to the left of the door fits a 7’ couch comfortably. We also designed the window sill to be slightly higher than the others to accommodate the back of a typical sofa.

Minimize hallways in small homes
The photo below shows the only hallway in this house. It connects the bedroom, bathroom, and front entrance. Minimizing hallways is crucial to optimizing floor space in small homes.

Bedroom door and window
The bedroom has a large southern facing window, which will bath the bedroom with light rear round. Also, notice the beautiful crown molding and craftsman headers.

Bathroom Vanity and Shower
The full-size bathroom is equipped with a 24” vanity, medicine cabinet, and full shower/bathtub. We also snuck in a window to add natural light.


Meanwhile, back on Mayher St–
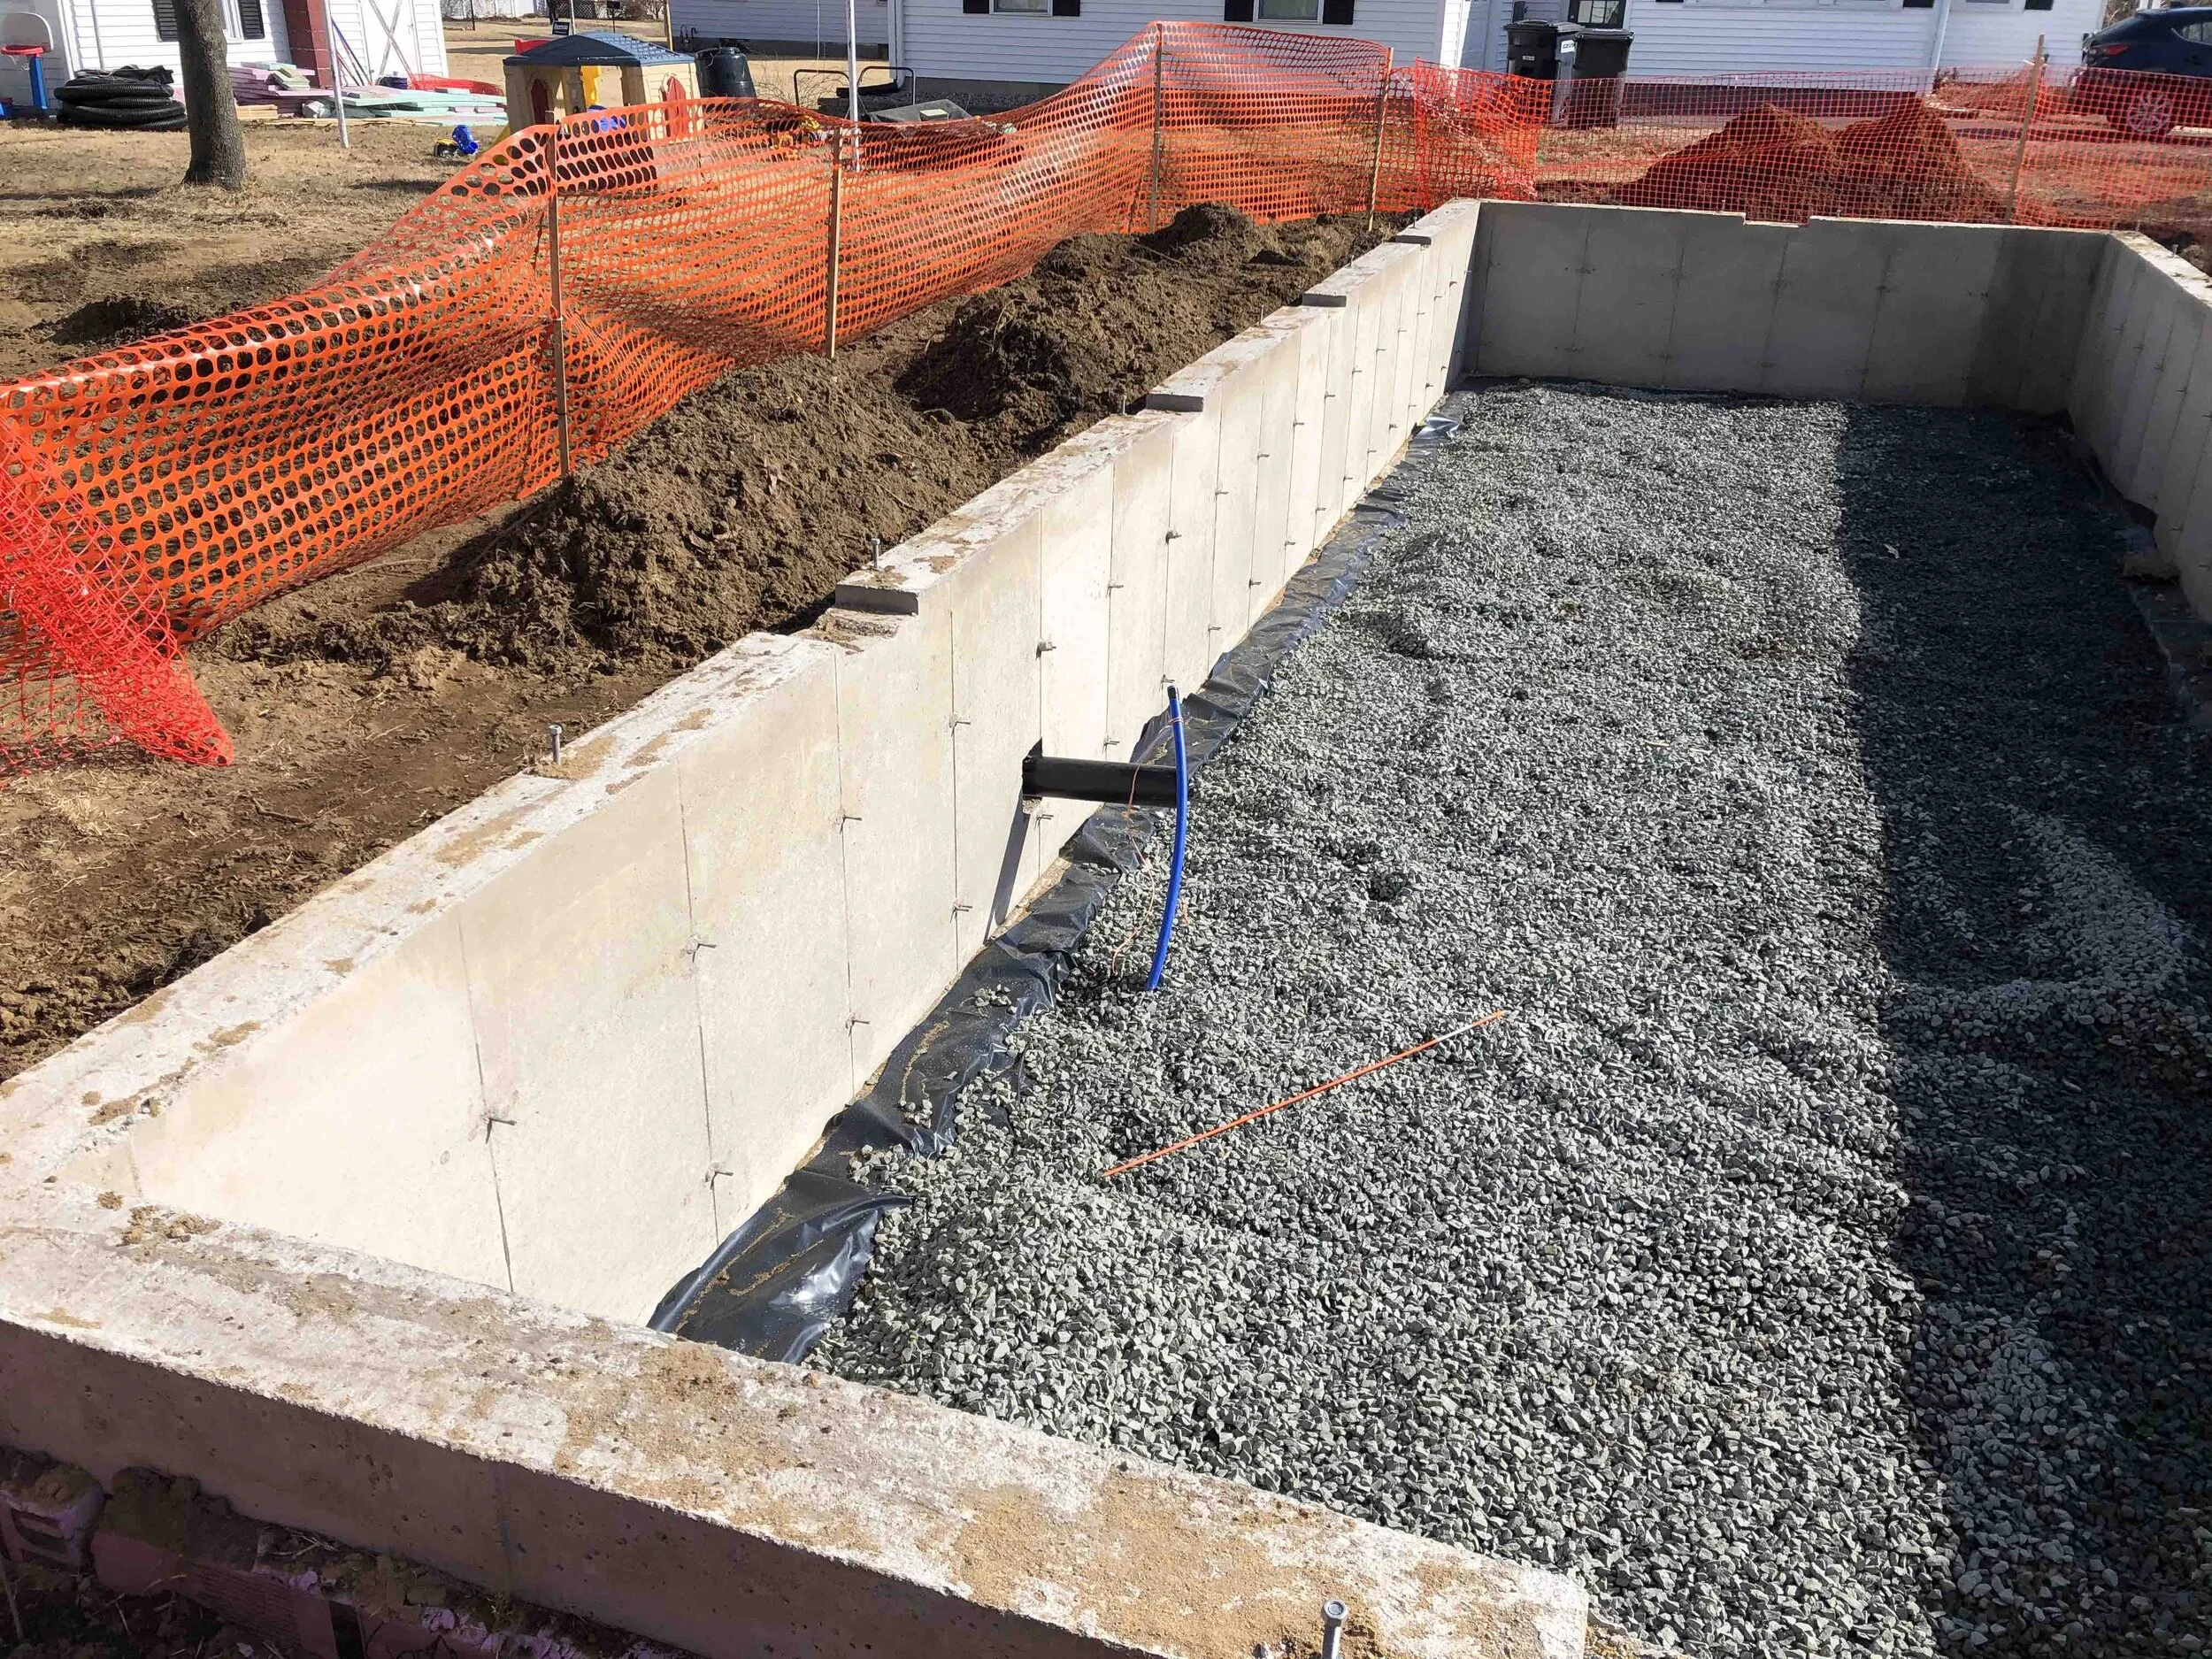
We are just about ready to receive the house. We stubbed the water, sewer, and electric connections, and then backfilled the foundation in preparation for setting the house.
Below you can see the sewer pipe and water line ready to be connected to.

The foundation is poured, backfilled, and almost ready for the house. The walls are just waiting for 4” of rigid foam board insulation.

Get notified of updates to the Mayher St project:

Mayher Street– Day 5
Every day that we open the Google Drive folder where Lori from PBS uploads progress photos (thanks Lori!), our minds are blown. At the end of day five everything is done with the exception of interior trim work, doors, and finish paint.
Every day that we open the Google Drive folder where Lori from PBS uploads progress photos (thanks Lori!), our minds are blown. At the end of day five, everything is done with the exception of interior trim work, doors, and finish paint.
The flooring is installed.
The cabinets are hung.
The bathroom vanity and medicine cabinet are in.
The toilet is bolted to the floor.
Our partner had all of the cabinetry installed by the end of day five. We suspect tomorrow they will install the crown molding on the top and, if they haven’t already, taken measurements for the countertops. Our partner using a local partner to cut and install the Hanstone Quartz countertops. We think this might be the only activity that causes downtime at the factory, but we are not sure there is another way to do a solid surface counter.
Our local team will do the backsplash after the house has arrived at Mayher St. The future homeowner wanted the backsplash to be the centerpiece of the kitchen so our local team will do a really nice custom mosaic.



Our Standard Cabinets
The base-level cabinets that our building partner installs at the factory are Merrillat Classics. They are very well made, include soft-close drawers and doors, and, when installed by our partner, provide incredible value for money. We suspect this stems from the relationship between PBS and Merillat and the enormous volumes that PBS purchases over the course of the year.
However, just like we are doing with the backsplash on this project, our local team will install the highly customized cabinetry when the house components arrive.

Externally Vented Hood Fan
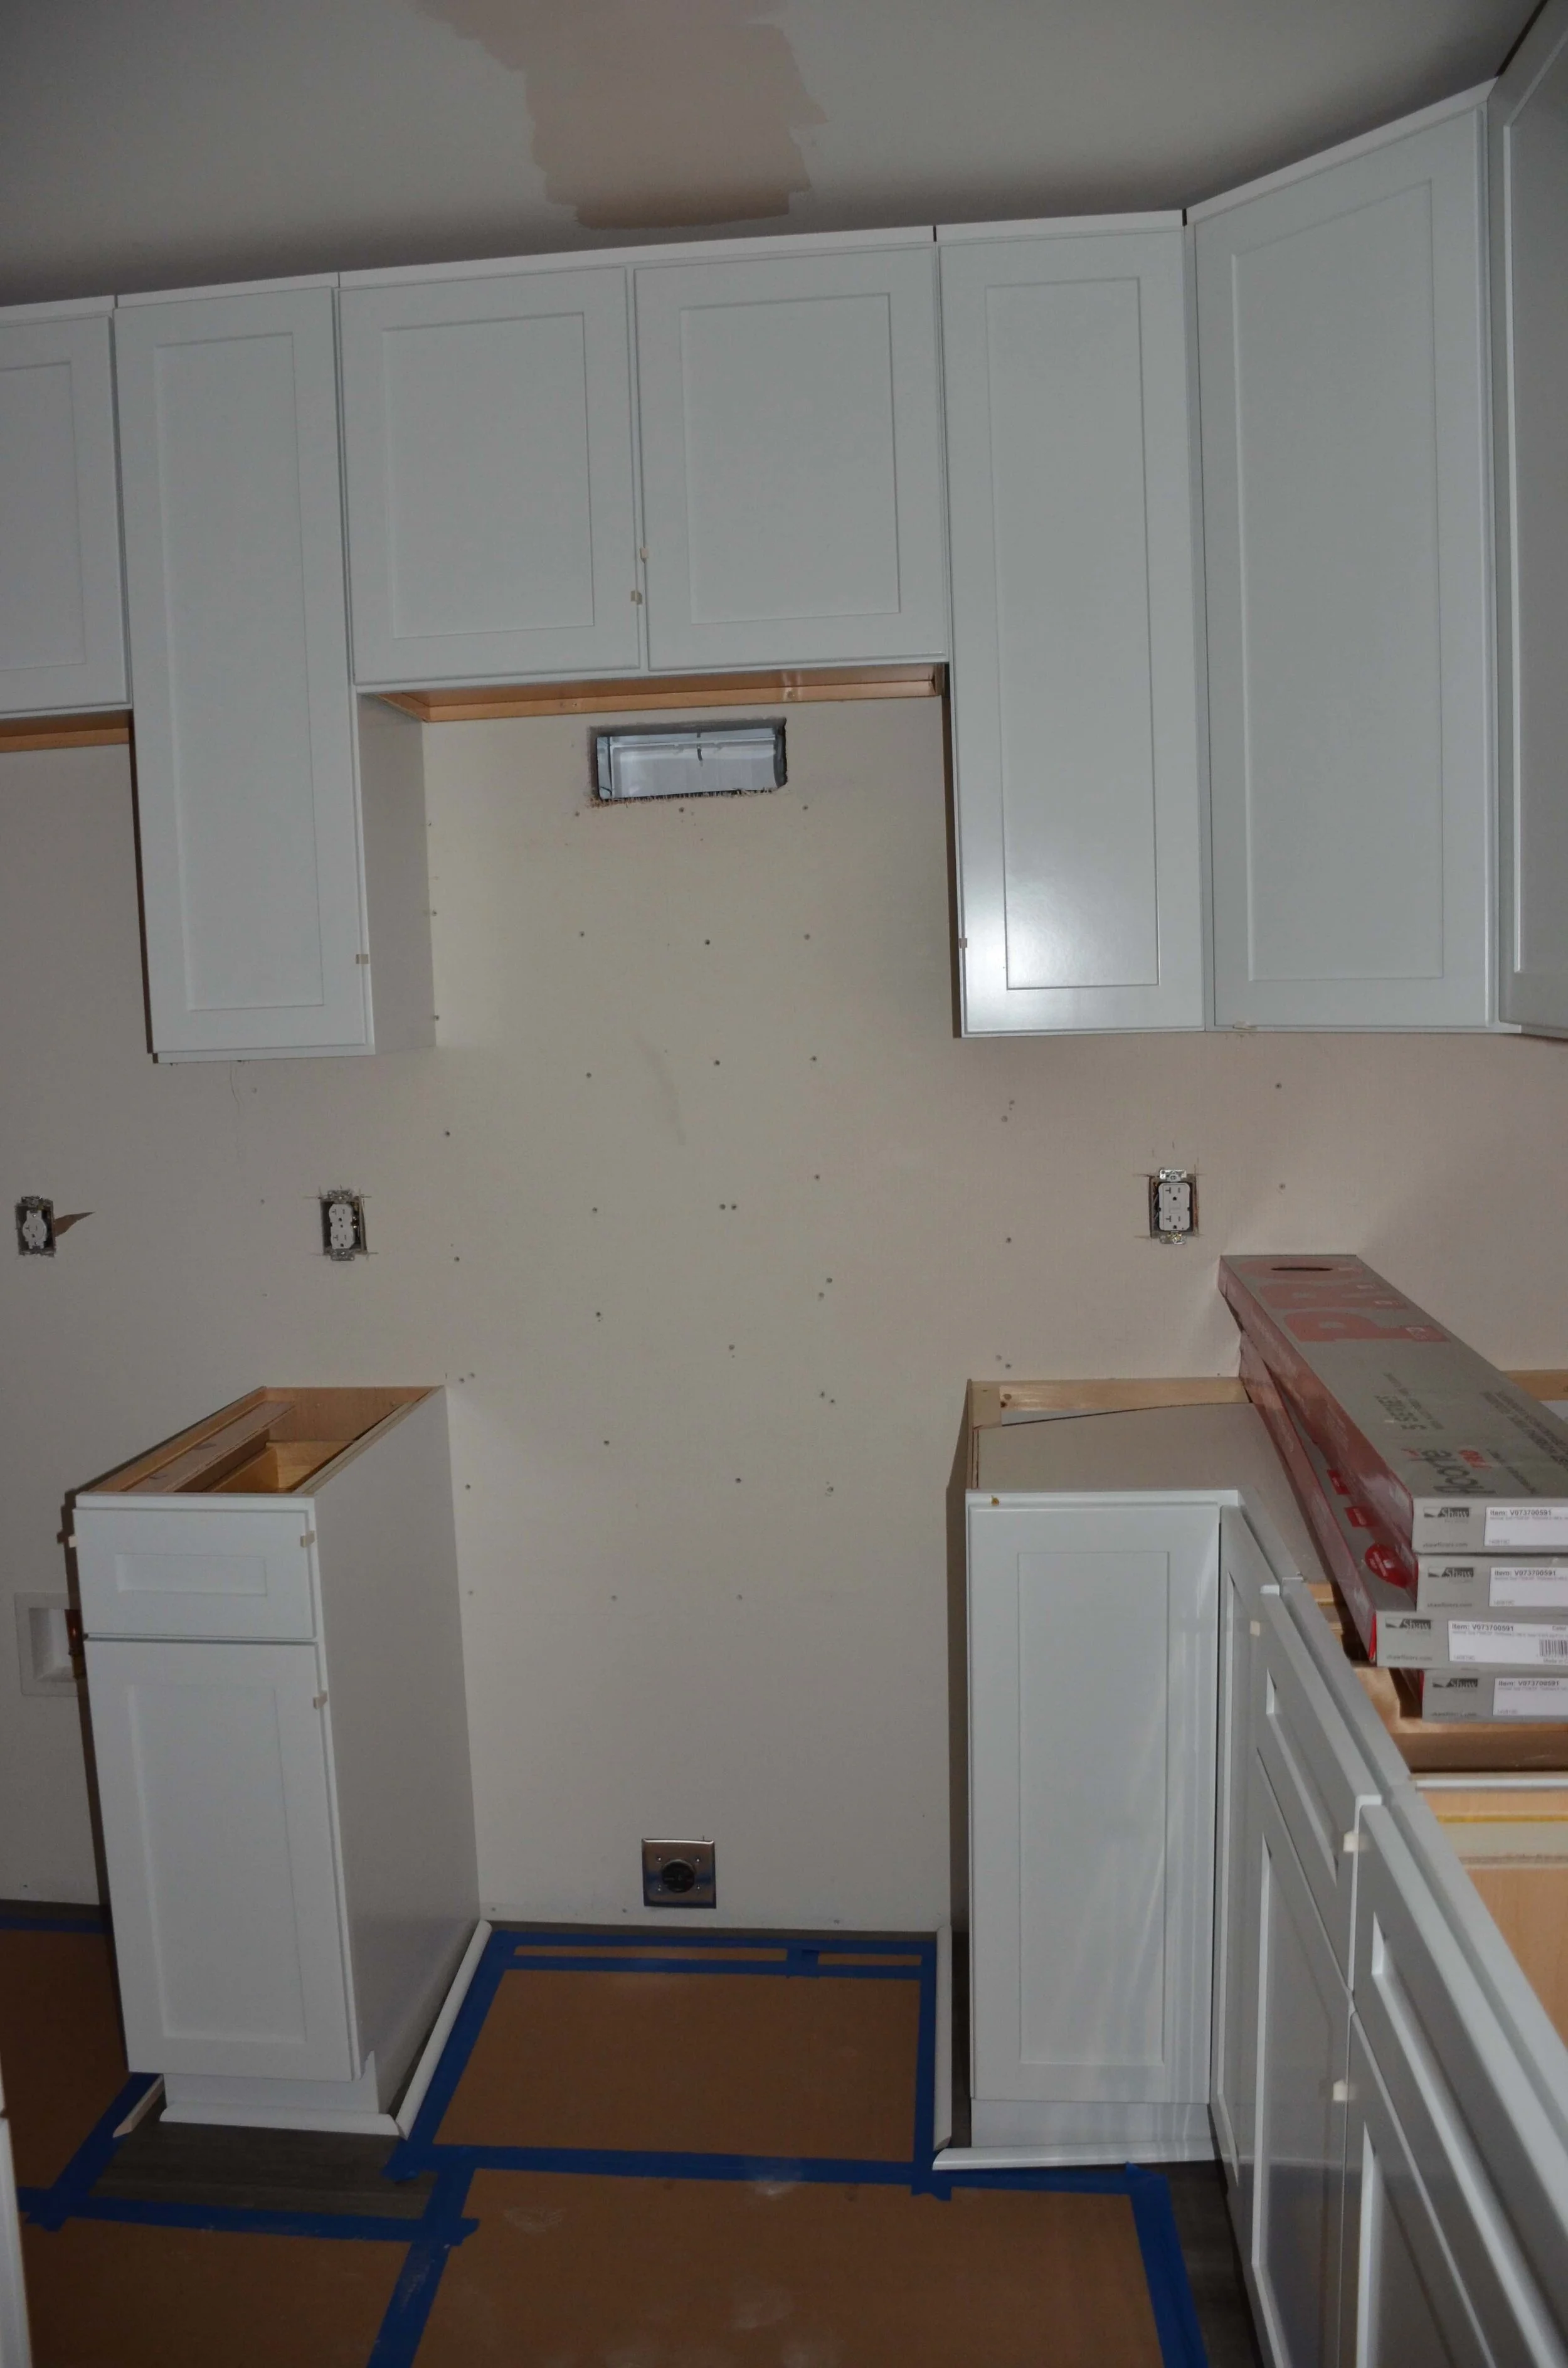
Never build a new house without an externally vented hood fan! This is especially important in small spaces because without it, burning something on the stove means the entire house will stink. This simple decision will save you huge aggravation and needing to open doors, windows and using fans to eject smoke and smells from the house.
We also recommend using a microwave exhaust fan combo to save space. On a research trip to Manny’s Appliances, we discovered the Whirlpool Low Profile Microwave/Hood combo. It is much less bulky than standard combo units and adds a nice touch to the kitchen.
In the photo below you can see the external vent that we’ll hook the microwave/hood combo to.
Looking into the Bedroom
The picture below shows the view into the bedroom. Once this house is secured to its foundation at Mayher St., that double window will let southern sun flood into the bedroom.

Bathroom Vanity and ADA Toilet
The bathroom is equipped with a small vanity and operational medicine cabinet to provide extra storage. We also include an ADA comfort height toilet in all of our homes. The grab was the homeowner’s good longterm planing as she will age as she lives in this home.


Bathtub with Grab Bars
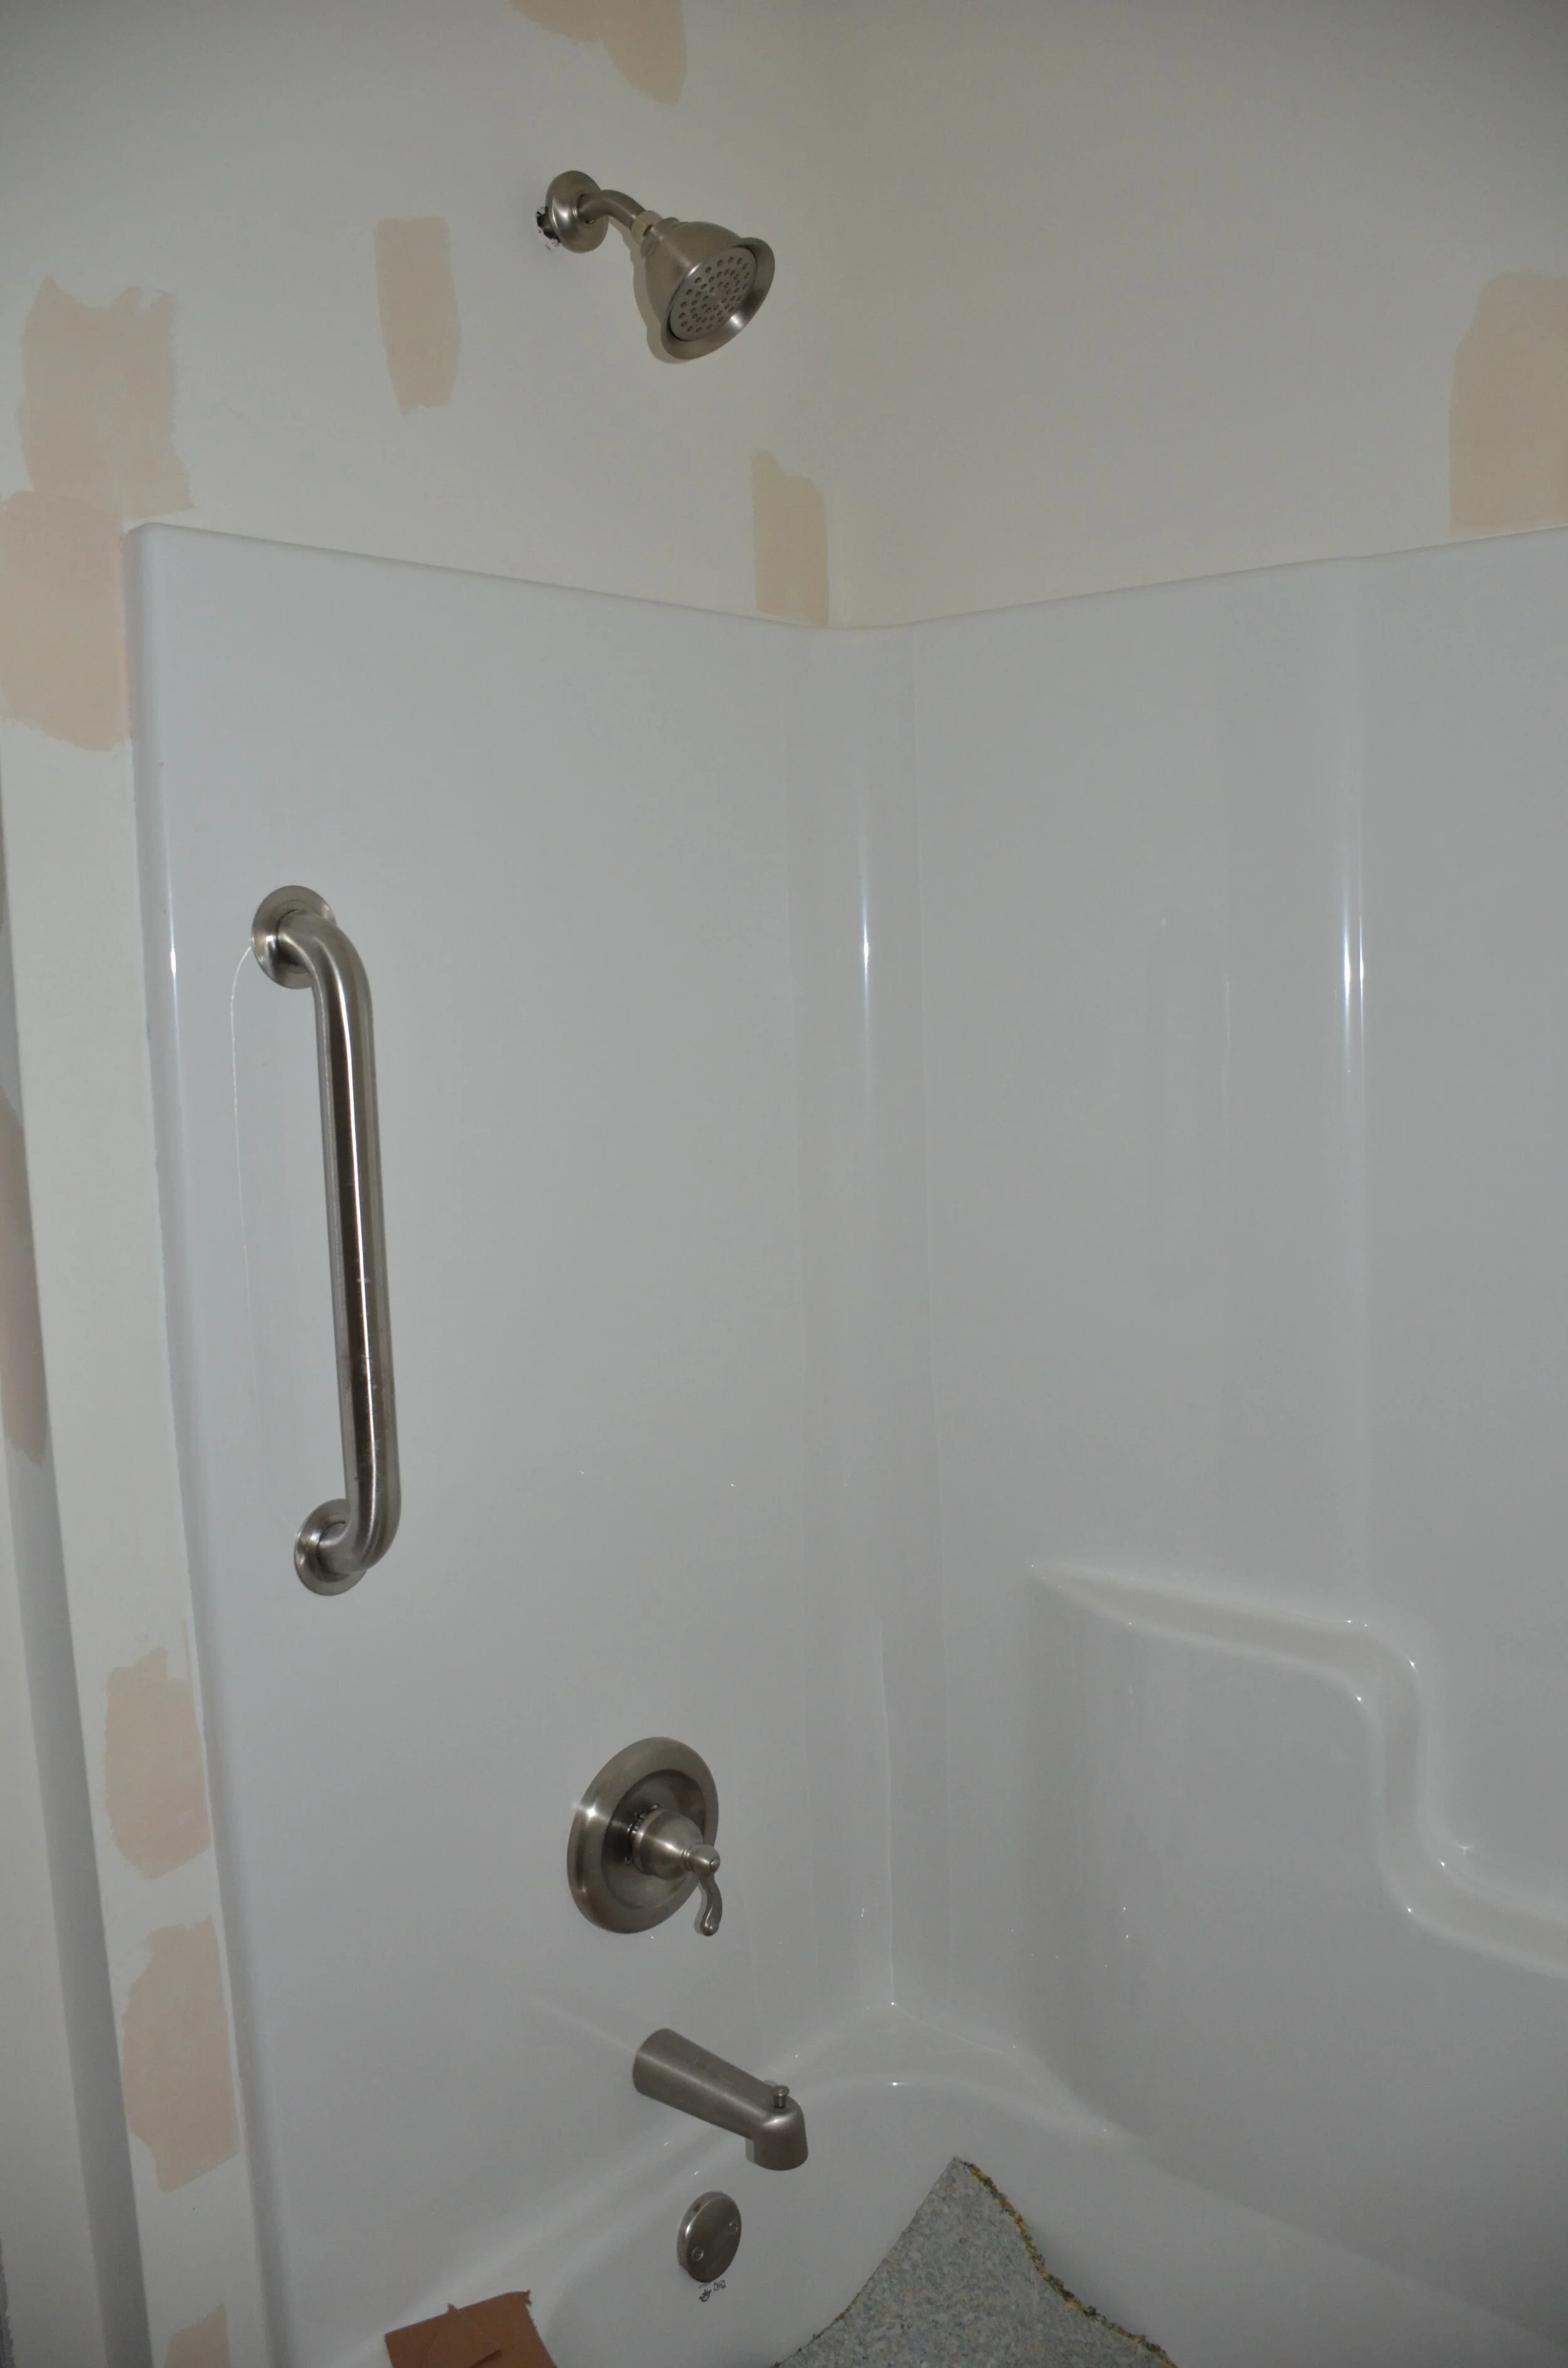
The tub/shower units that we use are built with reinforced fiberglass, which means they are sturdy like a traditional steel tub. It also means you can drive screws directly into the sides without needing a stud to add grab bars.
Siding and Trim Work
We discussed the siding and trim yesterday, but here are a few shots of the finished work. As you can see the combination of “premium color” Certainteed Mainstreet vinyl siding and Kleer trim looks very sharp. And remember it’s incredible affordable relative to Hardie Plank, which is a cement board siding.
Now that we can install nice trim work with vinyl siding, the biggest difference between vinyl and cement board is the sharpness of the lines. The corners on the cement board are as pointy and sharp as they are on wood, while vinyl is slightly more rounded. The Kleer trim’s corners are just as sharp as wood, which is why it looks great.


Ready for its trip to Easthampton
Before PBS sends the home into the elements, it is wrapped tightly with high grade plastic and made water tight. This protective jacket will protect the home from the elements until we’ve raised the roof and made the home itself water tight.

Meanwhile, back on Mayher St–
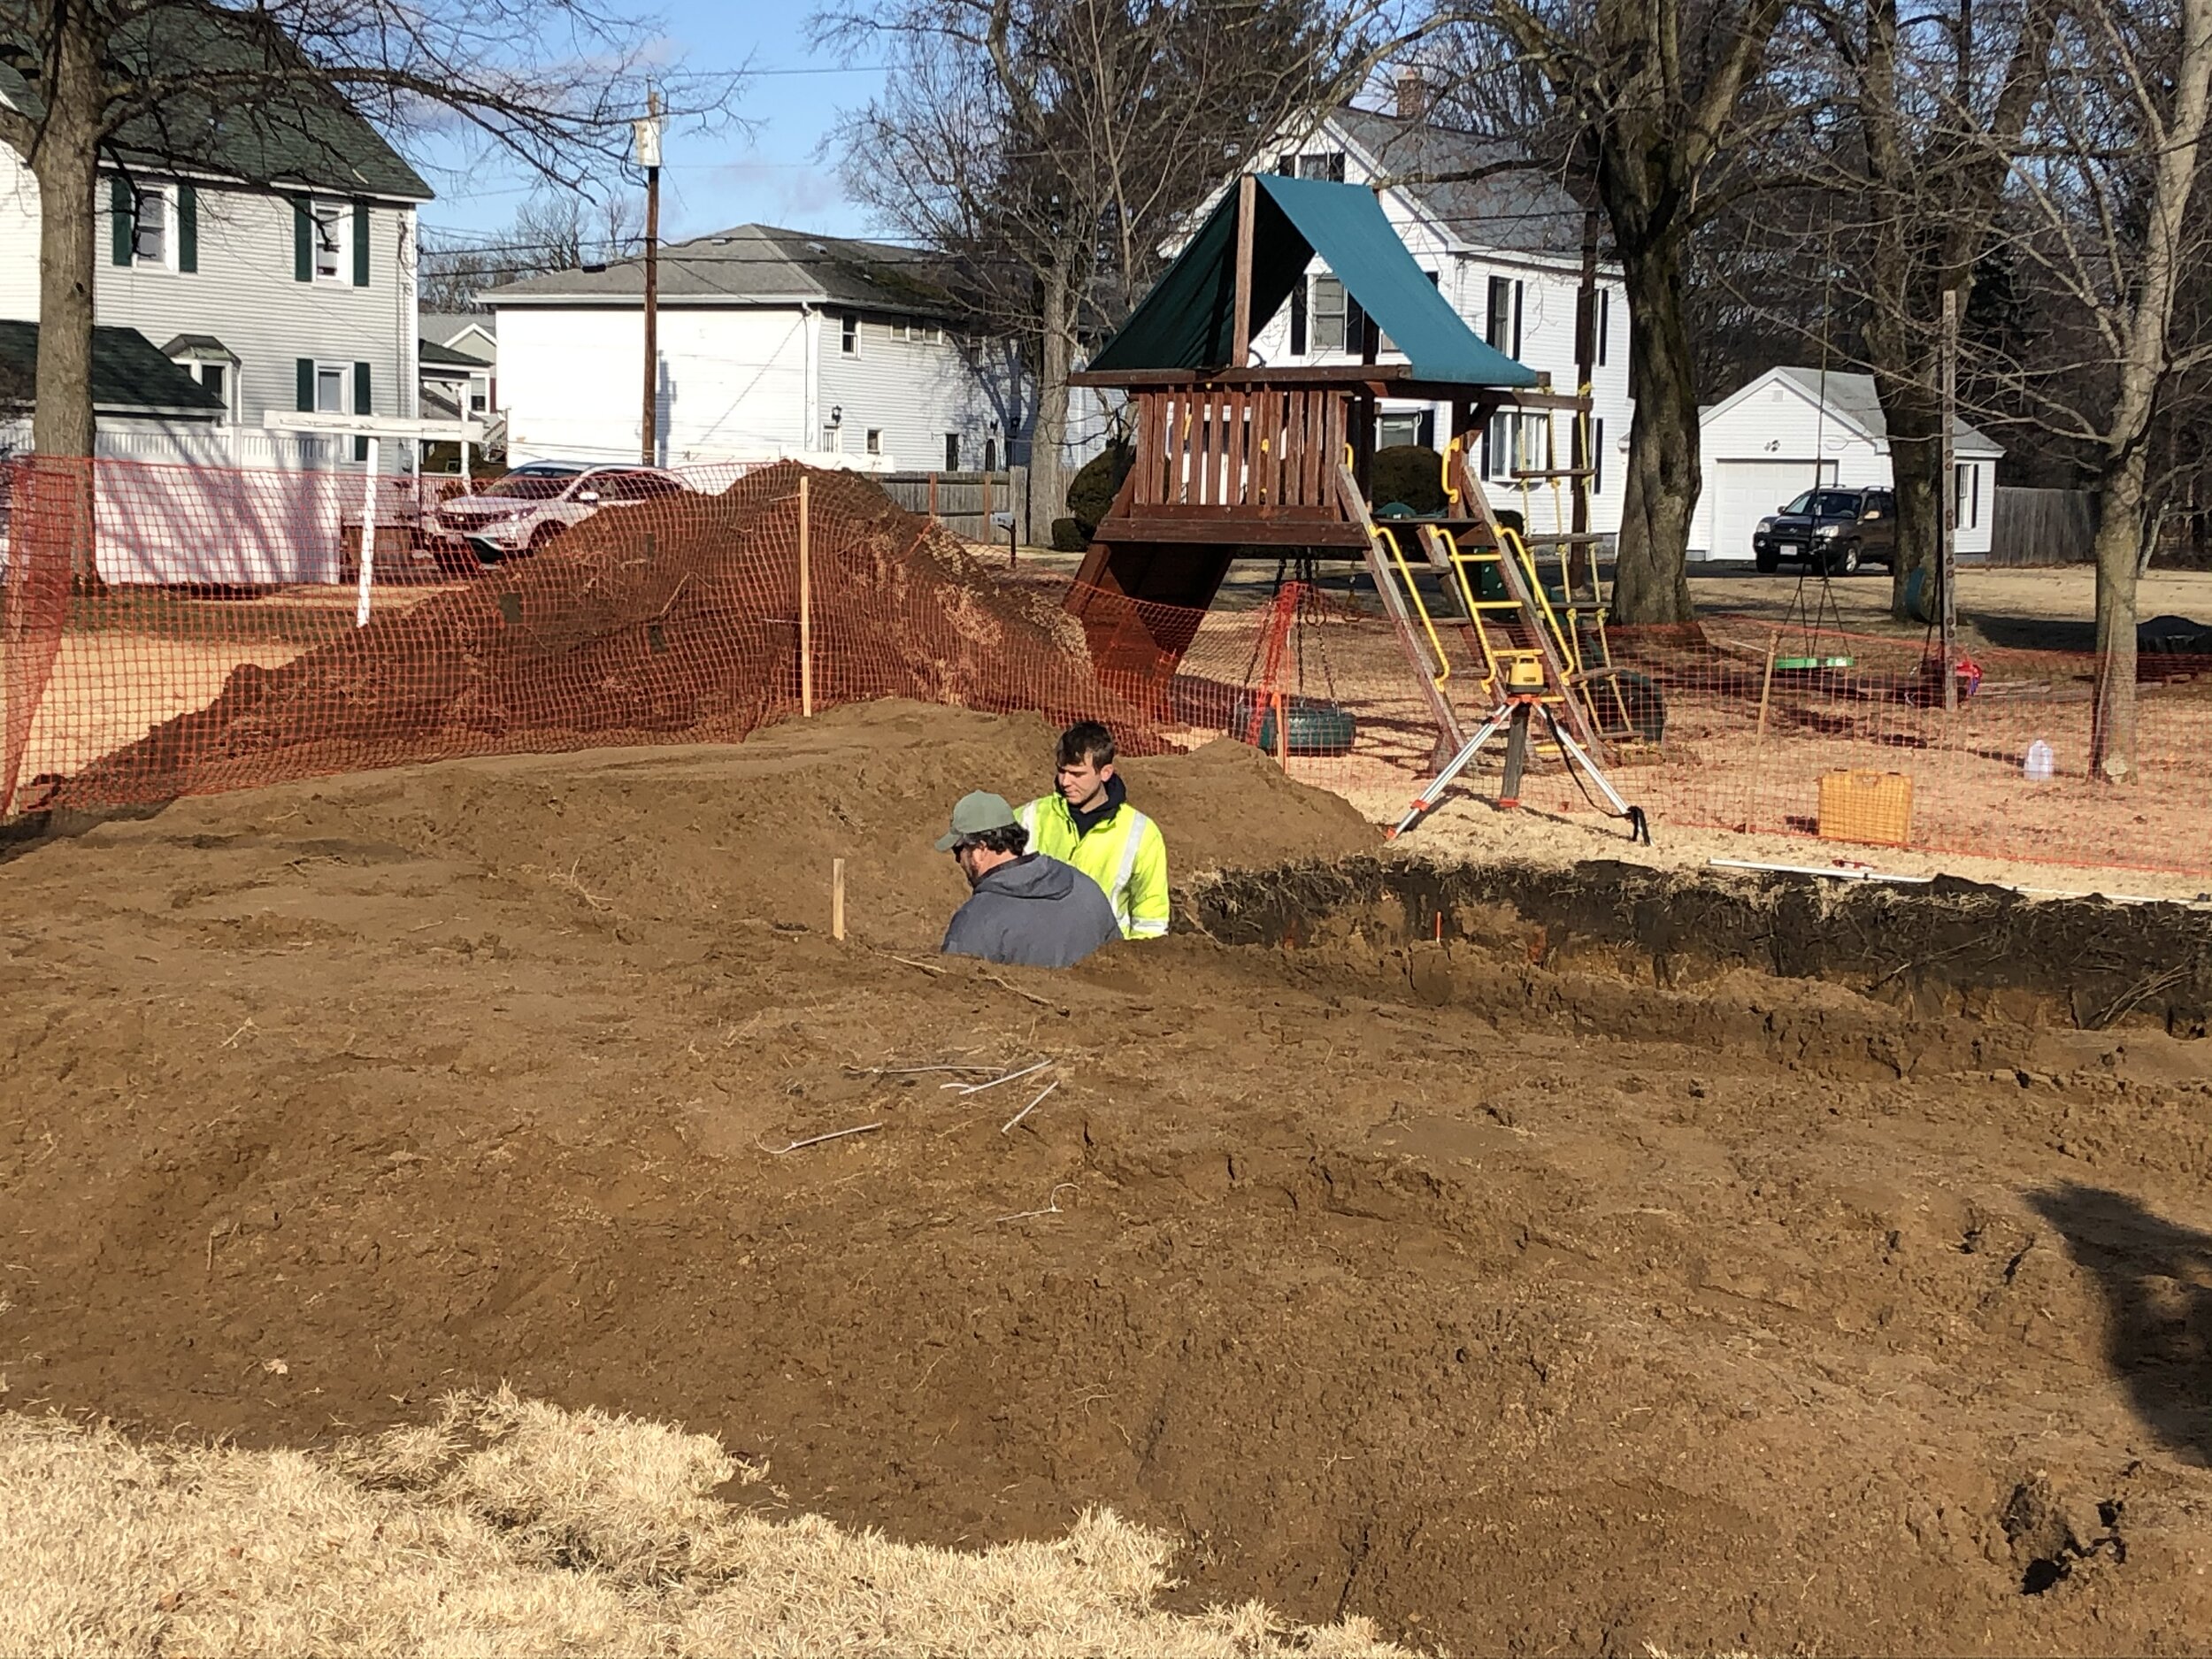
Mike and his son are hard at work prepping for the foundation’s footing to be poured. This means they need to locate exactly where we received approval to build the home. In this case, the home needs to be 30’ from the street and 25’ from the eastern neighbor.<
Last week we found the property line pins and confirmed that their location was accurate with a stone monument that the original surveyors put in place 100 years ago when they originally subdivided Grove and Mayher St. These pins are the bases for determining the location of the house in the backyard. Mike uses land surveying equipment to make these measurements and plot our where the foundation will be poured.

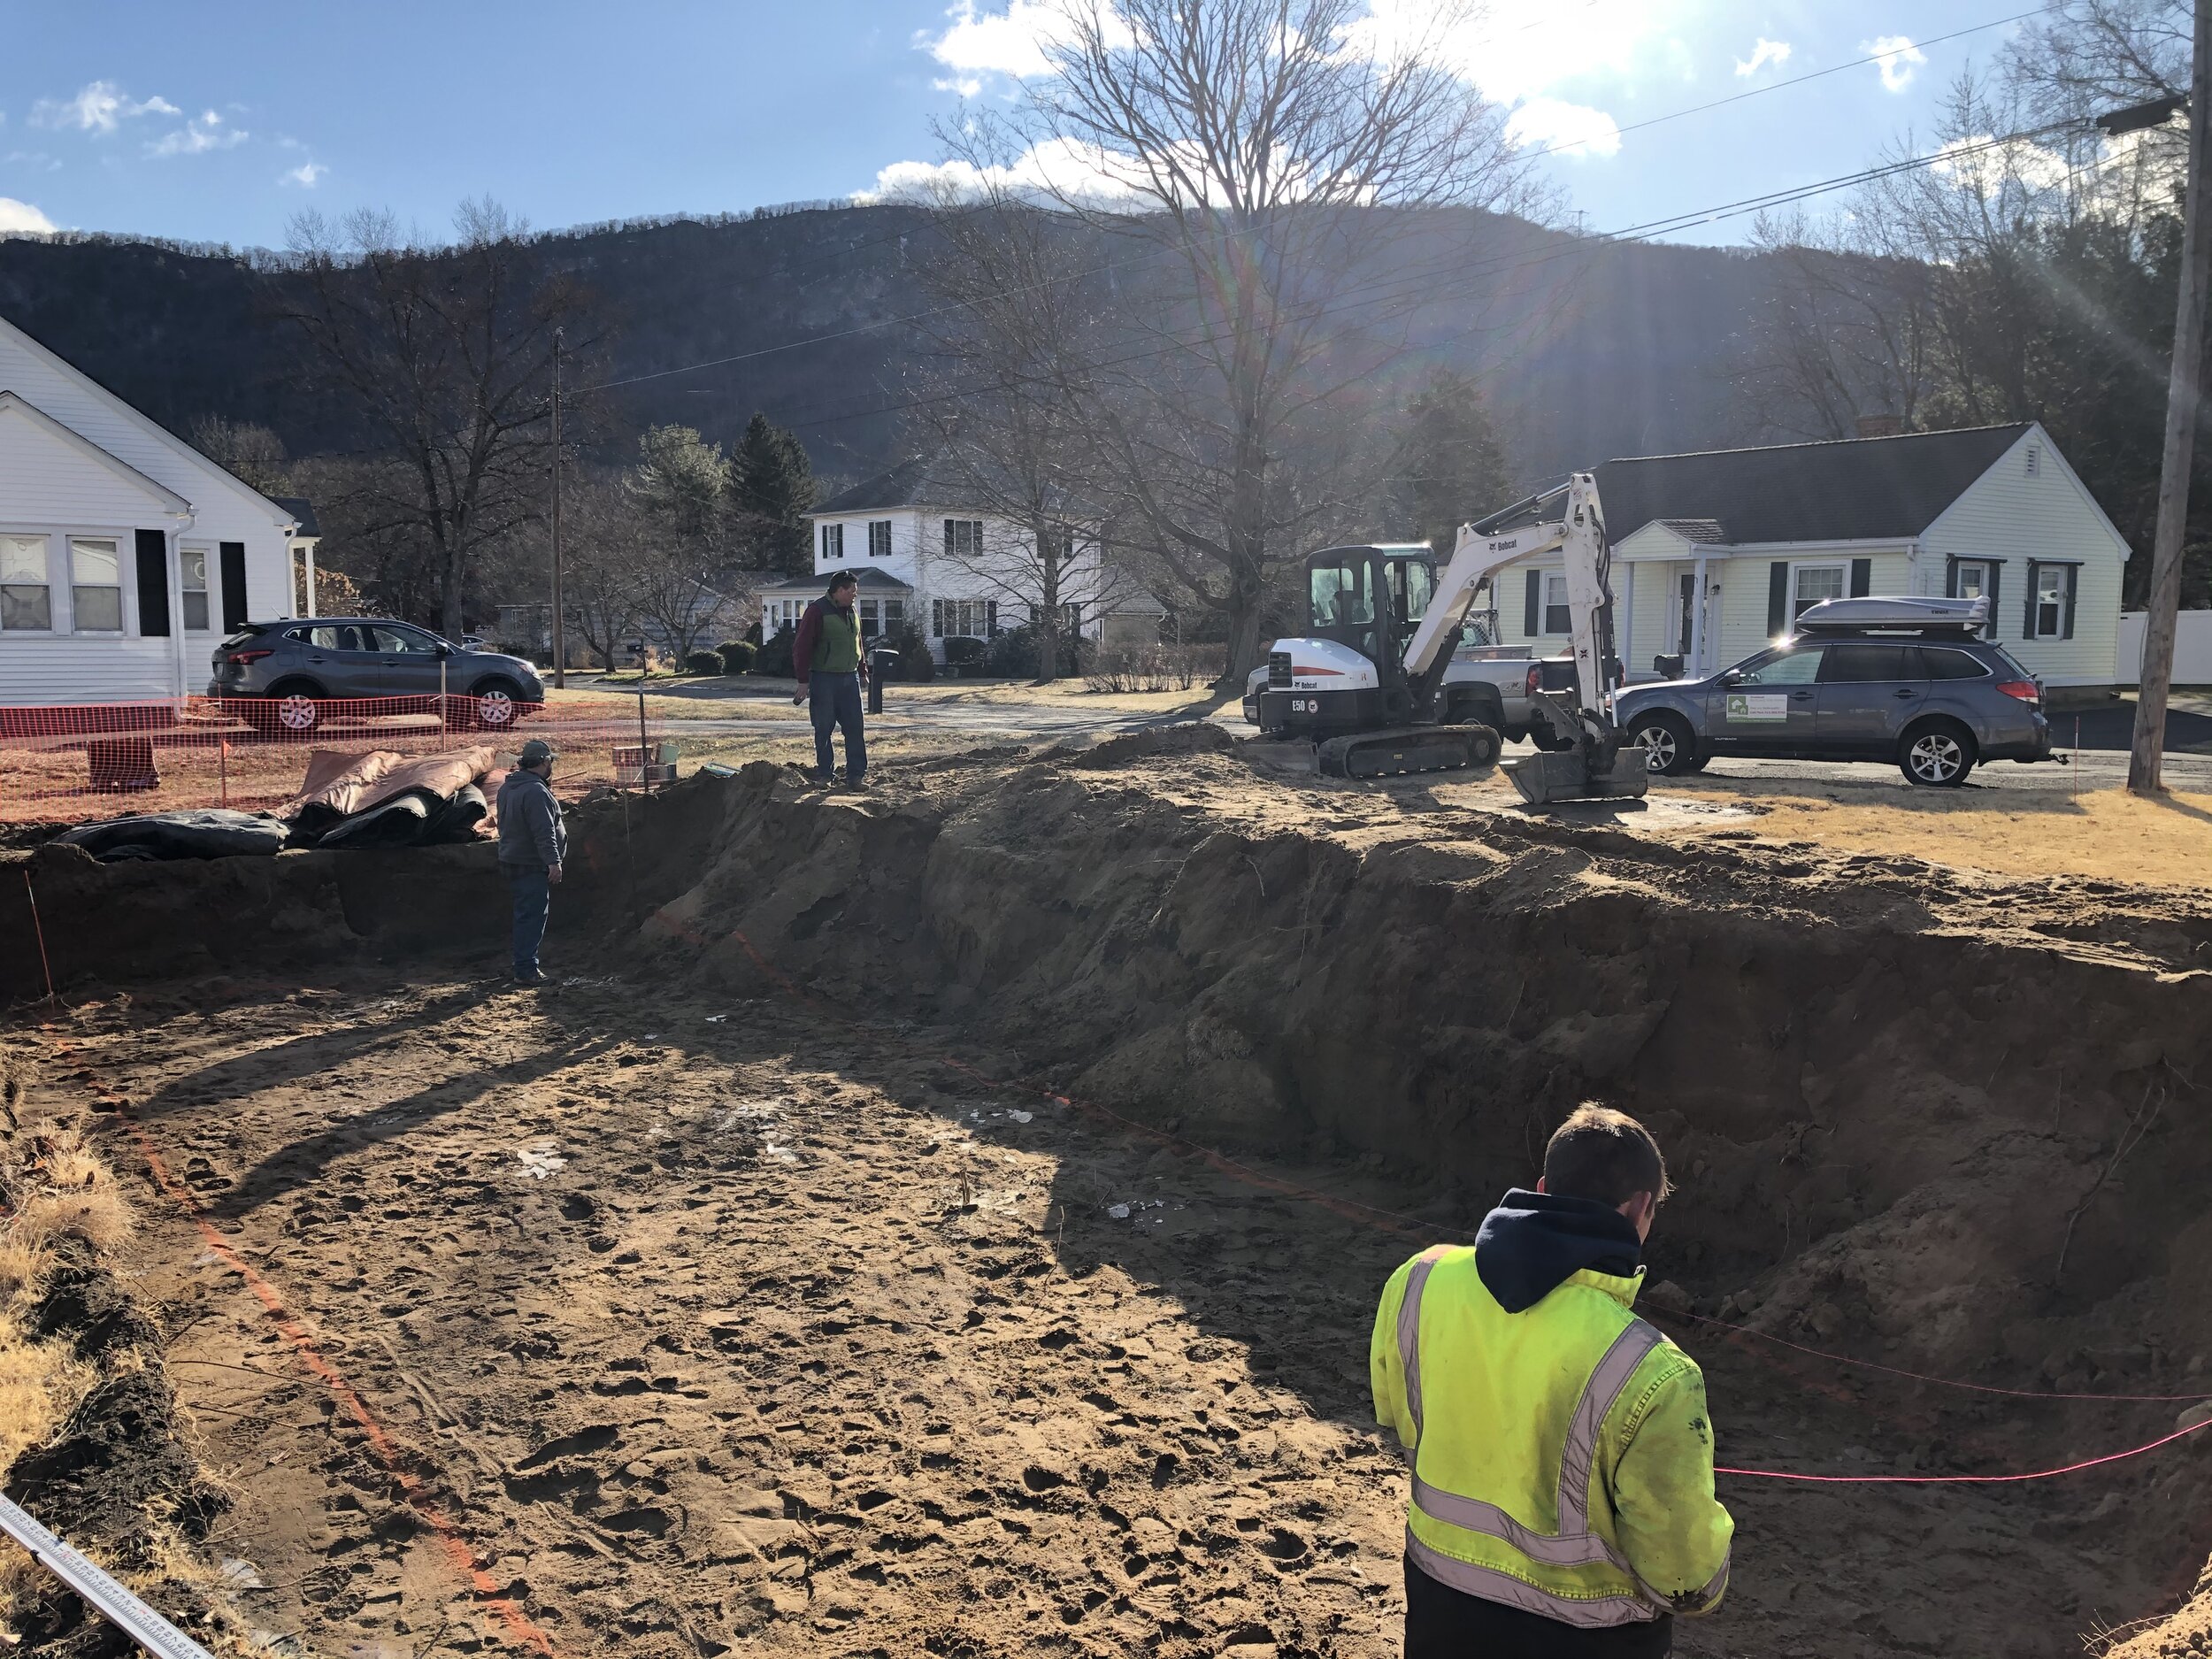
At the end of day five, the foundation hole was ready for footing to be poured and the area for a future parking pad was excavated. And co-founders Chris and Kevin finally took a deep a breath :)

Get notified of updates to the Mayher St project:

Mahyer Street– Day 4
On day four, not only were the cabinets installed, but all of the windows were operational. The team had completed the exterior, Kleer trim-work around the windows, and they had installed half of the siding.
On day four, no joke, our partner installed the f&*^ing kitchen cabinets.
Not only were the cabinets installed, but all of the windows were operational. The team had completed the exterior, Kleer trim-work around the windows, and they had installed half of the siding.
In the meantime, back in Easthampton, it was raining, so our team had to take the day off. I’m not saying this to prove the point I've been belaboring about the benefits of a hybrid construction process. It actually did rain and we actually did have to take the day off. This was all while PBS was still steaming ahead on the house itself.
No need to knock in the factory
Our craftsman style front door is in place, and if the team wasn't so concerned with the efficiency, you could even knock to come in. At this pace, however, there is no time to knock, let alone open and close a door. The team takes advantage of the factory's consistently warm weather and lack of non-human creatures to leave the front door wide open.

Cabinets, baby cabinets
One day four, our partner is installing the kitchen cabinets.
In the photo below, notice that the cabinets extend to the ceiling. We recommend using ceiling height cabinets like this in small homes because it provides extra storage space. In a small kitchen, it doesn’t result in a huge price increase.
We also recommend including a cabinet above the sink instead of a window to provide even more storage. In this kitchen, the sink is on the shorter wall in the bigger opening.

Harvey Windows
We upgrade our windows to Harvey Slimline by default. They look great, and the gain in quality over a standard Plygem window (standard window at Home Depot) is phenomenal and only results in a modest cost increase.
Triple paned windows are also a great place to allocate extra money during construction. We do not include them as standard because they do not make a significant impact on energy efficiency. However, they do make sitting by a window much more comfortable on a cold winter’s day and reduce sound transmission.

The electrical panel is ready
The picture below shows an electrical panel before an electrician connects the wires to all of the breakers. From here, it will take the electrician an additional 2 hours to finish wiring the panel.

They're installing the siding
When you have two people installing siding, it goes on quickly. As you can see below, one person cuts the pieces of siding to size, leans them against the house where they are needed, and someone else nails each piece in place.
Kleer window and door trim
In the last ten years, building material companies have made considerable advances that make vinyl siding more attractive. It’s still not Hardie Plank, but it cost about 80% less. We think that for any budget-conscious homeowners, that “premium color” Certainteed Mainstreet vinyl siding and Kleer trim is the way to go.
Kleer is one company that has made aesthetic advances in the plastic siding space. In the photo below, you can see their 3 1/2” trim around the windows and doors. This trim is Kleer’s answer to traditional “J-Channel” that is one of the main culprits in making vinyl-clad houses look ugly.
Like Hardie Plank, these two products will ensure that you never deal with flaking paint and only need to re-paint if you want to change the color of your house.


Deluxe & premium colors
Our homeowner chose an excellent color for their home. It is going to do a great job complimenting the cedar shingle gables that we will be adding on-site. One of our local partners, Lou Conover, of Shingle Designs, is doing some shingle art on the gable ends (aka “the handmade case for factory-built iPhone” from my previous post)
When using vinyl siding on a house, it very important to choose from the premium colors. The standard colors almost always look washed out, faded, and overall cheap. If our customer decides to stick with vinyl instead of upgrading to Hardie, we actually don’t let them use the standard colors as they will be disappointed with the finished product.

Meanwhile, back in Easthampton…
It’s raining.
So the site still looks like the photo from yesterday, just wetter.

Get notified of updates to the Mayher St project:

Mayher Street– Day 3
On day three, ALL of the plumbing and electrical has been installed, the drywall is up and mudded and we’ve broken ground in Easthampton to get ready to lay a foundation.
Our factory partner doesn’t work on the weekends, but based on the photos we received Monday afternoon, it sure looks like they did. The drywall was all hung and the first coats of mud had been applied and sanded. For those less familiar with construction, this means their team installed ALL of the plumbing and electrical in the first three days of work. That is mind-boggling.
While PBS was hard at work building the house, we broke ground in Easthampton. Before the modular home components arrive, we need to have a foundation ready and utilities stubbed in the crawl space.
Break Neck Speed in the Living Room
Electrical Done.
Plumbing Done.
Drywall done.
Wow. At the end of day three, you can almost see the couch and coffee table in the living room (living room photo below).
When we received these images on day three, we asked if the factory had been running all weekend, but of course, it wasn’t so the team could spend time with their families. Our partner PBS has the advantage of having their electricians, plumbers, drywallers, and carpenters in the same building every day. That means having electrical and plumbing work completed in the morning and starting the drywall in the afternoon is routine, which is nearly impossible when building everything onsite with specialists managing jobs in many locations.
Apparently, drywall doesn’t dry fast enough on its own.
In the photo below, notice the torpedo heater cranking up the temperature in the home. This allows the team to apply and sand multiple coats of drywall mud on the same day. They also left the Rex Wrap over the windows and doors to trap the heat and prevent dust from escaping into the rest of the workshop.
In addition to the torpedo heaters, the factory uses industrial fans to speed up the drying & sanding cycles even more. This action helps each person on their team boost their productivity. Downtime is not only expensive, but it’s boring for the team members and as I’m sure you can relate, it can make a workday last forever.


Backdoor and spot for the couch
Below, you can see the opening for the back door, which is required by code to provide a second means of egress. This requirement is a bit unfortunate in such a small house as it takes up a lot of wall space where otherwise, a homeowner could put furniture.
The window on the left is also slightly higher off the floor than other windows to allow a couch to fit neatly under it. We reckon the future occupant will sit on the couch and look out that window at her grandchild playing the backyard between her home and her daughter’s home. This moment is one of the many moments that detached Accessory Dwelling Units (ADUs) make possible.

Home wrap and mini-split circuit
All the homes are sealed meticulously in weather resistance wrap. The wrap provides air sealing and an added layer of protection from the weather.
You can also see a circuit hanging from the right corner that will provide power to our mini-split system’s compressor.

What a factory
PBS’s space is enormous. The photo below is one of two plants of this size that are building modular components for residential home builders, real estate developers, hotels, and of course, Backyard ADUs. When Kevin and I first toured these spaces, we realized we had no choice but to include modular components in our construction process.
The alternative was charging customers more and forcing them to make more compromises on the features they wanted in their home. We also realized that a hybrid construction process that combines the factory’s team and our onsite carpenters is the future.

The hinged roof system
When partnering with a modular component factory, the only constraint in what you can build in the factory is what you can ship down the highway. This means to include a roof with a traditional New England pitch, the roof system needs to be hinged. PBS partners with a roof truss company to engineer hinged roof systems than can be quickly raised with a crane, secured in place, and then made watertight.
Below you can see the roof’s components. PBS hinges each face of the roof at its connection to the lower walls. The overhangs of each roof plane are also hinged and flipped over, so the home conforms to transportation width limits.
Theoretically speaking, if a homeowner wanted to move the house in the future, they could disassemble the roof and put it right back on a truck. It would probably cost about $10,000 to move a home to a new location and re-raise the roof.

Meanwhile, we broke ground on Mayher St.
While our factory partner was building the house, we broke ground where the house will be for the foreseeable future.
The first bucket of earth came when we removed a Japanese maple that, unfortunately, could not be saved. We consulted an arborist, and he said due to some disease and wounds on the trunk, it would be a 50/50 chance whether we could transplant it successfully on our own. It would have cost over $2,000 to have the pros come in and increase the likelihood of survival to 90%. We’ll likely replace it with a new tree!

Foundation hole done
At the end of day one, Mike Bartlett had the foundation hole excavated and had moved much of the excavated soil off-site. The digging conditions in this part of Easthampton are wonderful.

Regulation
MA requires that contractors block off holes of all sorts for public safety. This regulation is one that is often a burden to the contractor and, as a result, unfortunately an increased cost to the homeowner. As you saw in the previous photo, the foundation hole is hard to miss and then accidentally fall into.
Get notified of updates to the Mayher St project:

Mayher Street– Day 2
On day two, our partners are already hanging drywall. The pace of construction in a factory environment is just phenomenal.
On day two, our partners have already installed the tub and are hanging drywall. The pace of construction in a factory environment is just phenomenal. Henry Ford revolutionized the car over 100 years ago by innovating factory processes. The result was a triple threat– high paid jobs, a lower-priced product, and higher, more consistent quality. As I started working on Backyard ADUs and toured the first set of module factories, I couldn't understand why home construction was such a noticeable hold-out in leveraging factory methods to improve their product.
Think about it–
Are any of the high tech products in your house built one by one in an environment with uncontrollable variables like the weather?
Your iPhone and laptop are built in a controlled environment to ensure quality, and then, you personalize it with awesome, often local, handmade accessories. Interestingly, this is what we do at Backyard ADUs with homes.
East and West Walls
The photo below shows the exterior face of the home's eastern wall. In the distance, you can see the huge western facing window that will bathe the living room and kitchen with late afternoon sun.
You will also see the 2x6 construction on the exterior walls. The thicker walls increase rigidity and allow us to install enough insulation to be Net Zero Ready.

Drywall is glued and screwed
In the photo below, notice the yellow around each of the vertical studs. That is glue. Seriously, the factory glues the drywall on and then also screws it in place. The adhesive is likely overkilled (we never did it as stick builders), but our factory partner tells us that it reduces the chance of cracking and makes the home even tighter.
Also, notice the blocking under the window opening (two thin horizontal pieces of wood). This blocking adds additional rigidity around where an outlet will be. This is another feature I’d never seen until touring PBS’s factory, but it makes sense. Outlets get far more abuse than other areas of a wall so it makes sense to beef up the drywall.

Protected subfloor & spot for the headboard
Below you can see the back wall of the bedroom. In this home, the wall has 9’ of uninterrupted horizontal space to put a bed. This room as a large double window facing south, which will provide ample light.
The large closet with space for a washer-dryer is on the left.
In this shot, you can also see the protective covering that gets placed over the subfloor. The plastic covering helps keep dust, liquids, and other materials from getting mashed into the floor, which can create problems for installing the finished flooring.

Check out the living room
Finally, look at the huge double window. Can you picture the view from the couch? The living/kitchen area has another matching window on the southern wall, which is out of view on the left in this photo.

Coat closet
In the center of photo below is the large coat closet. It’s located right in the middle of the house across from the front door. The entrance to the bathroom is on the right.

Laundry Hook Ups
The laundry hook ups are installed and ready! They are located in the enormous closet which has an extra long 60” bifold door.
Notice the yellowish brown material in the wall with the hook ups. This is Roxul dense insulation to add some soundproofing to the bathroom space. We add this soundproofing as standard in all of our homes. Why? Well, you know why ;) .

The bathtub and shower is looking great
Don’t forget, it is still day two of construction. At the end of day two the house has plumbing, some electric and the bathtub!
Our factory partner is able move this quickly because their team of carpenters, electricians, plumbers, and drywallers come to work at the same place everyday. All of their tools, extra parts (plumbing bits, wire, wood, screws, etc.) are in a supply closet, not in a building supply shop or at the Home Depot 15 miles away. They are able to switch between multiple projects in the same 100,000SF facility, which means specialists move from home to home as they are needed without getting in a truck. The time [and cost] savings is enormous.

Get notified of updates to the Mayher St project:

Mayher Street– Day 1
Our factory partner, PBS Modular, kicked off construction today of the modular components for our backyard home being built at 8 Mayher St in Easthampton. The entire build will take them roughly two weeks, after which they will send us the components to finish on-site in Easthampton.
Our factory partner, PBS Modular, kicked off construction today of the modular components for our backyard home being built on Mayher & Grove St in Easthampton. The entire build will take them roughly two weeks, after which they will send us the components to finish on-site in Easthampton.
Day one at the factory is crucial
On day one, the team lines up their jigs to our (Backyard ADUs) specifications. This ensures the floor system is perfectly square and exactly the size we agreed on with the homeowner, not 1” bigger or smaller. This is the base for a straight, well-built building, and our partner PBS Modular knows it.

Homes are efficiently moved through the factory
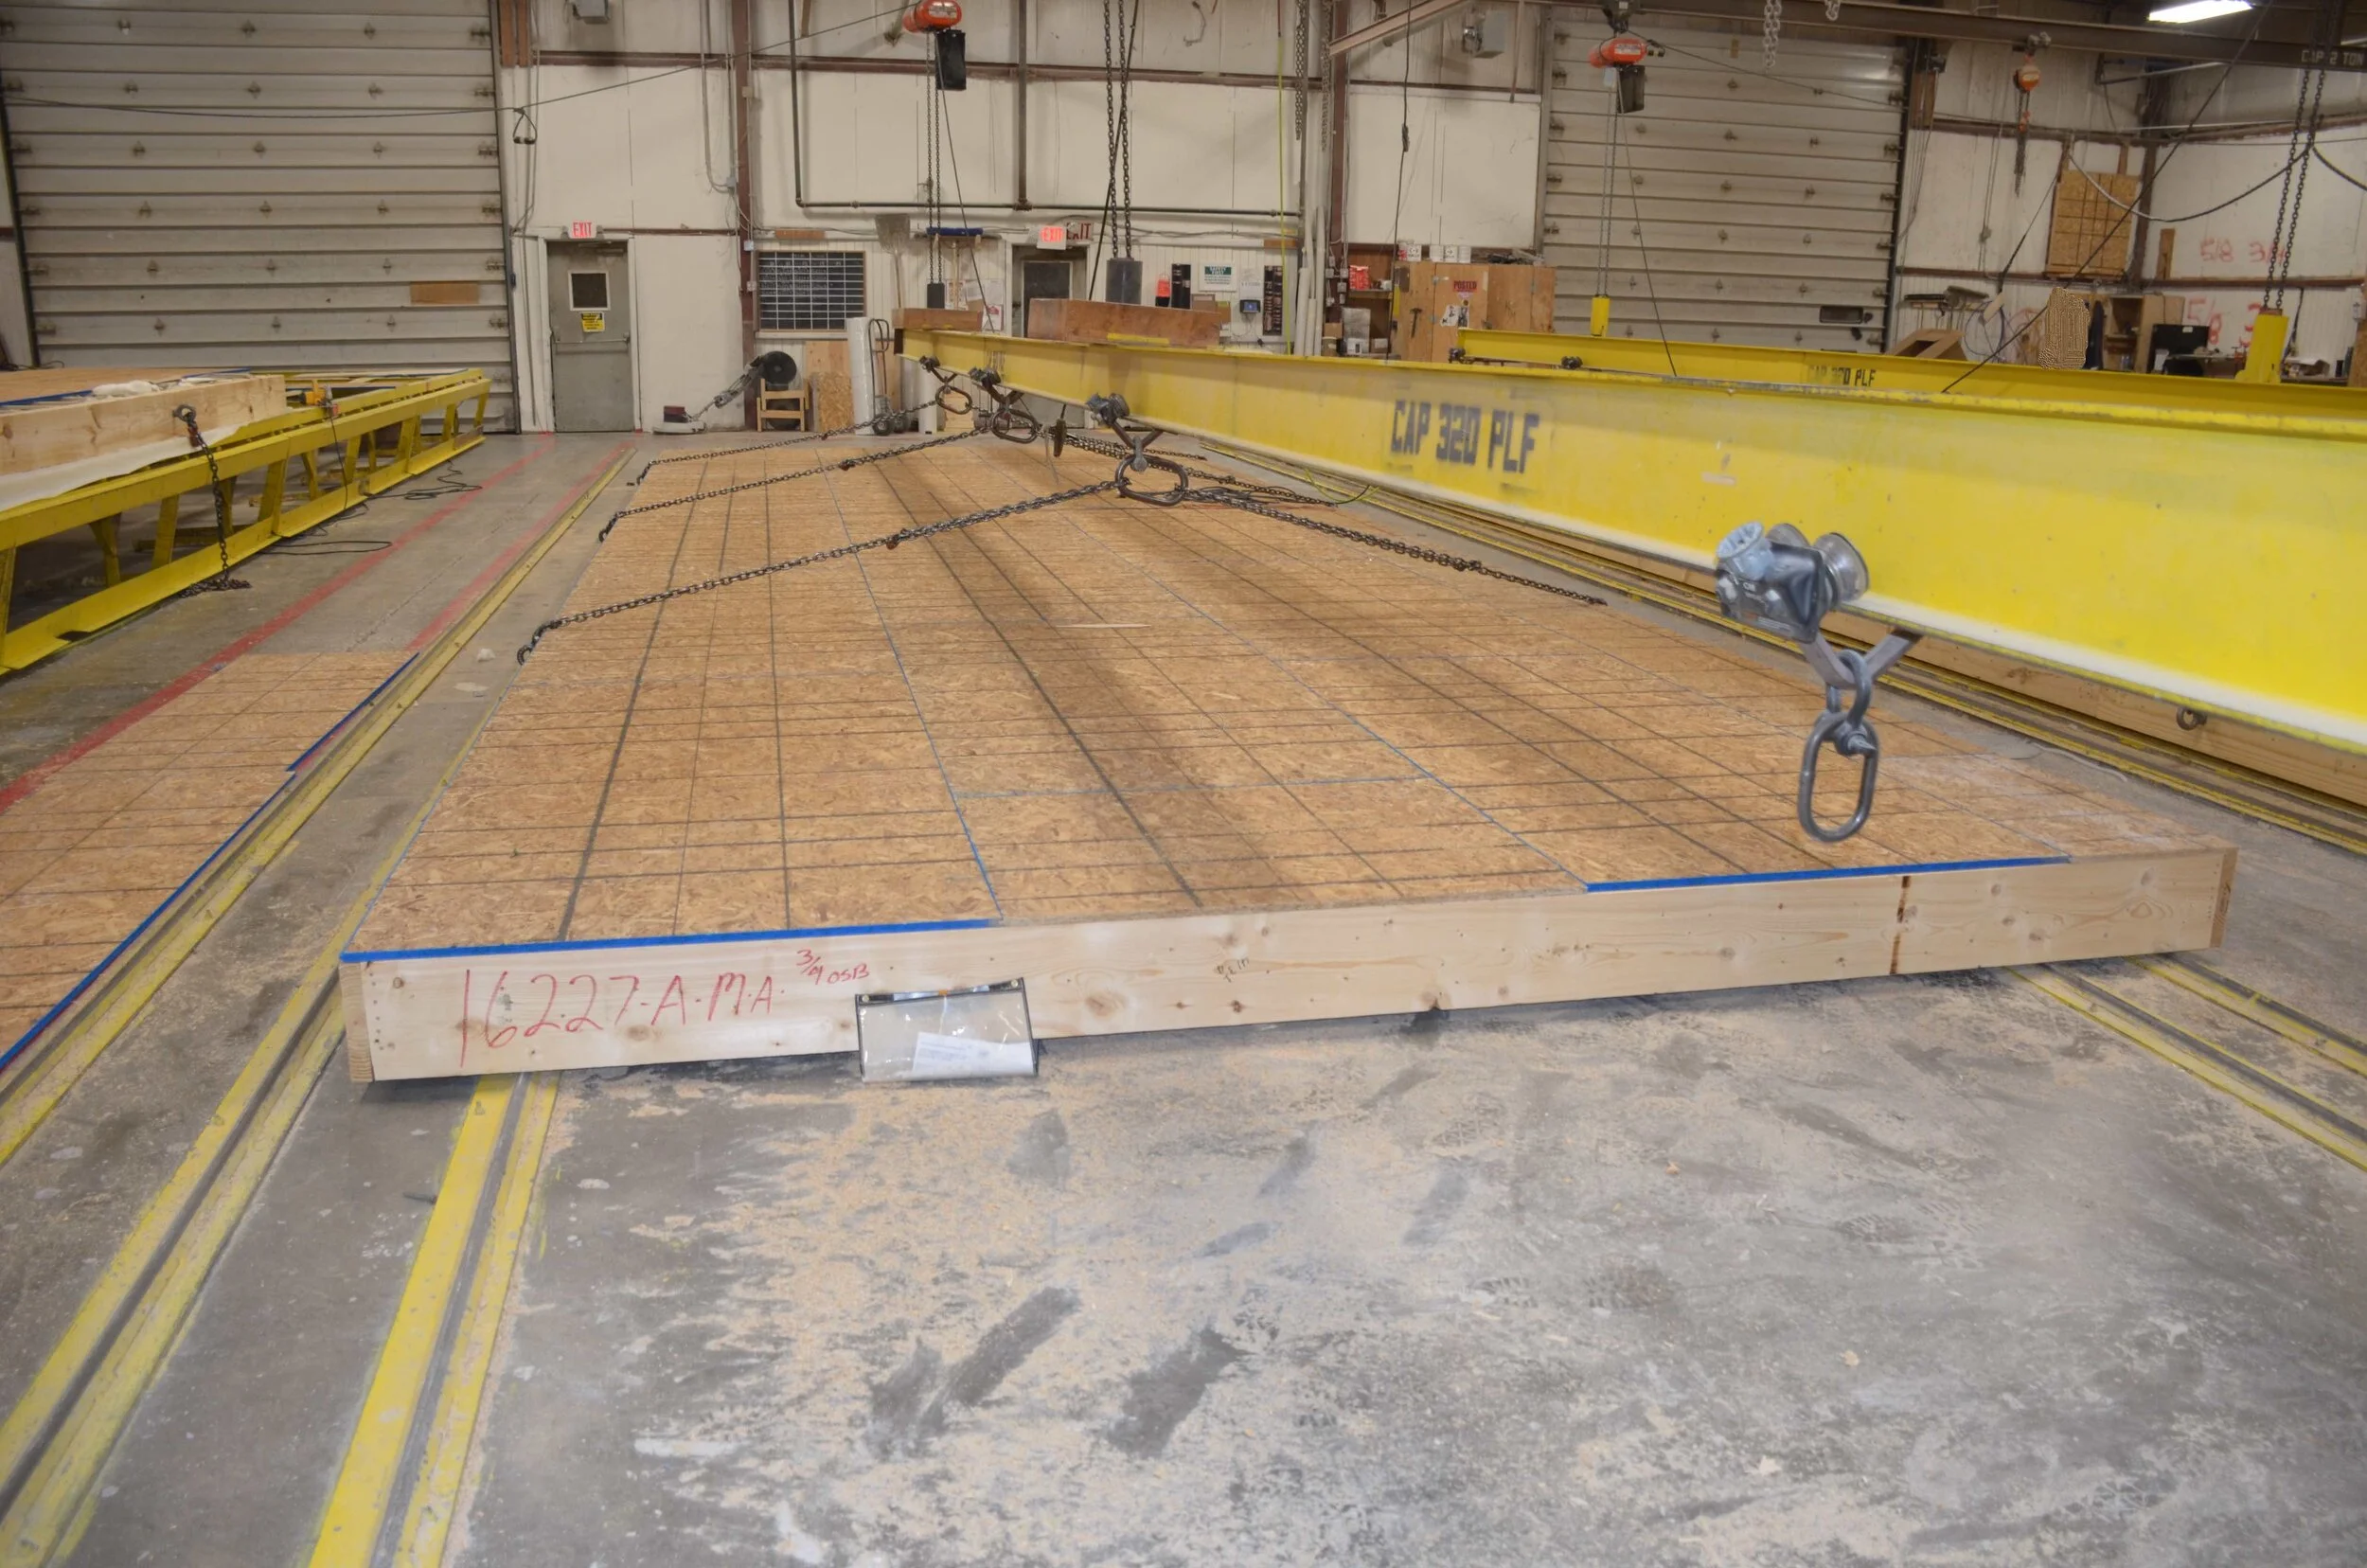
The factory team moves homes through their factory quickly, safely and efficiently, which saves homeowners money. Notice in the next photo the team is using the in-house crane system to move another builder’s floor system labeled with the serial number 16233. 16233 is traveling to New York in order to make room to have the subfloor on our project installed.

You can also see that PBS installs our floor joist 12” on center, which goes above and beyond building code and creates a floor that feels as stiff as concrete. It could probably even hold an elephant. Unfortunately, those who reminisce over the bounce in old New England homes may be disappointed.
Quality control at every step
Finally, notice in the next photo the sign off sheet hanging on the side of the floor system. No one can finish the floor system with the OSB (Oriented Strand Board) subfloor until a supervising foreman has signed off on the underlying floor joists.

Finishing the day with the OSB subfloor
Finally, the day wraps up with the team installing 3/4” OSB plywood. This secures the entire floor system together and acts as the base for future finished flooring.
Soon after the OSB is installed, our home is hoisted to the next station where a team will start building the wall and installing drywall.